You know that frustrating feeling when your Monstera or pothos just keeps growing and growing, but the leaves stay small and unimpressive? Sometimes it even seems like they’re getting smaller and smaller over time. I went through this and it took me a while to understand. The problem wasn’t lack of light, water, or fertilizer — it was the absence of a support that made sense for the plant’s natural growth habit. That’s when I discovered that these vines don’t just need a “stake”, they need a living, moist, stimulating structure: the moss pole.
Why did your climbing plant stop growing big leaves?
The answer lies in the evolutionary memory of these plants. In nature, Monsteras, Philodendrons, Syngoniums, and pothos are climbing epiphytes: they scale huge trees in the forest, anchoring their aerial roots into trunks covered with moss and organic matter. When those roots find consistent moisture and a firm support, the plant understands that it is “climbing” and can invest energy in larger, more deeply cut leaves.
Without that stimulus — when it grows hanging or tied to a dry bamboo stick — the plant stays in a “juvenile mode”, with small, solid leaves, no fenestrations, and horizontal or even trailing growth. This is what botanists call etiolation due to lack of adequate support.

What is a moss pole and why it is the best support for climbing foliage plants
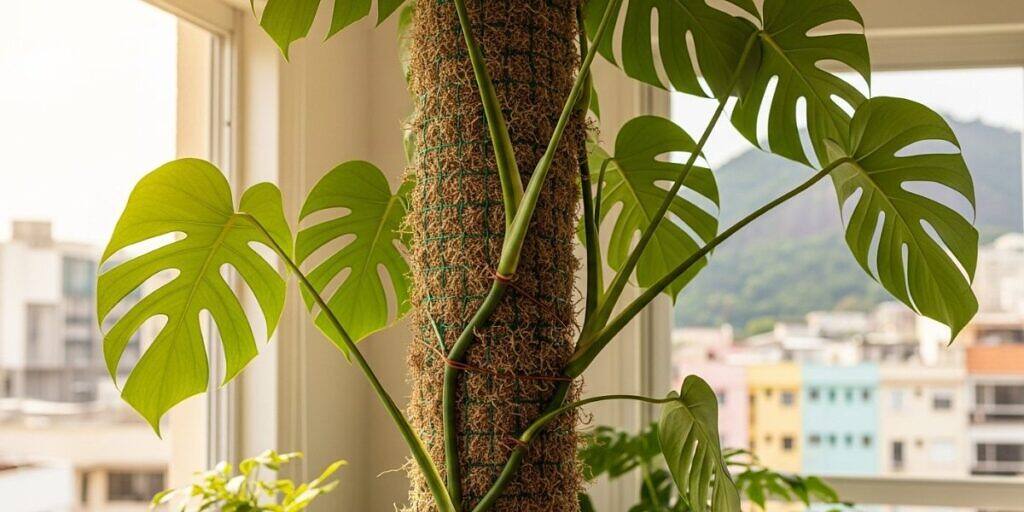
The moss pole is a cylindrical structure made with moist sphagnum moss wrapped in mesh. It closely mimics the natural environment of these plants: a vertical, porous, consistently damp support where the roots can attach and “drink” water.
Unlike dry stakes or wooden trellises, the moss pole offers three essential benefits:
- Constant moisture for the aerial roots
- Physical support that triggers mature leaf growth
- Extra nutrition, since the moss retains irrigation water, which can be enriched with fertilizer
At home, the difference was dramatic. My Monstera adansonii doubled its leaf size in just three months after I installed a moss pole.
The science behind giant leaves: The secret of Araceae
The stimulus of physical support and constant humidity
There is a phenomenon called thigmotropism — the way plants respond to physical touch. When a climbing plant feels a solid, consistently moist support, it interprets this as a sign that it is in a safe environment to grow vertically. The plant literally changes its morphology: the internodes become shorter, the leaves larger, and the fenestrations (those iconic “holes” on Monstera leaves) appear or multiply.
Without this stimulus, the plant keeps “searching” for support, producing long stems and small leaves — a waste of energy.

The role of aerial roots in plant development
Aerial roots are not just decorative. They function as anchors and extra absorption tubes. When they sink into moist sphagnum moss, they take up additional water and nutrients, reducing the load on the main roots in the potting mix. This frees the plant to grow faster and with greater vigor.
This evolutionary strategy allows Araceae to thrive in the shaded understory of tropical forests, where every drop of moisture on tree trunks makes a difference.
Materials you need to make your sphagnum moss pole
Dehydrated sphagnum moss: Where to find it and how to choose
Sphagnum moss (Sphagnum) is commonly sold as “Dried Sphagnum Moss for Orchids” or “Dehydrated Sphagnum Moss.” You can find it in garden centers, nurseries, farm and feed stores, and on major online marketplaces.
Important: Do not confuse real sphagnum moss with decorative “green moss” (the brightly dyed craft moss). It does not retain water the same way and is merely ornamental. True sphagnum moss is light brown, fibrous, soft, and expands significantly when hydrated.
Plastic mesh and core supports for the structure
To wrap the moss, use nursery mesh or plastic poultry netting with a 0.4–0.8 in (1–2 cm) grid. It is flexible and resistant to moisture.
If you want a sturdier moss pole, add a central core such as:
- 1″ (25 mm) PVC pipe (found at hardware or home improvement stores)
- Treated bamboo (moisture-resistant)
The core prevents the moss pole from bending as the plant grows and becomes heavier.
Fastening accessories and cutting tools
To secure everything, you will need:
- Nylon zip ties
- Vinyl-coated galvanized wire
- Fishing line (monofilament) for an almost invisible finish
And the basic tools: wire cutters and protective gloves (more on that in a moment).

Health and safety precautions when handling sphagnum moss
Preventing sporotrichosis and using gloves
Here is an important warning, without being alarmist. There is a low but real risk of contracting sporotrichosis when handling sphagnum moss. This is a fungal infection caused by Sporothrix schenckii, which can live in moss and organic soil and enter the skin through small cuts or scratches.
Prevention is simple: always wear gardening gloves when handling moss poles, especially if you have small wounds on your hands. Many gardeners only learn this after reading worrying reports in horticulture forums.
The importance of hydrating sphagnum moss before handling
Dry sphagnum moss releases a lot of dust. Besides irritating the respiratory tract, this dust can carry fungal spores. Always hydrate the moss in a bucket before you start assembling your moss pole. This greatly reduces the risk of inhalation and makes handling much easier. Wearing a mask also helps.
Step-by-step guide to assembling your moss pole at home
Preparing and hydrating dry sphagnum moss
Fill a bucket with warm water and soak the moss for 20 minutes. If you want to give it a rooting boost, add a vitamin B1 solution or a diluted rooting fertilizer.
Then gently squeeze out the excess water from the moss — it should be moist, not waterlogged.
Measuring and assembling the cylinder
Cut the plastic mesh to the desired height. Important: allow an extra 6–8″ (15–20 cm) that will be buried in the potting mix to provide stability. Many growers even prefer to extend the moss pole all the way to the bottom of the pot. The width of the mesh should form a cylinder about 2–3″ (5–8 cm) in diameter.
Step by step:
- Spread the damp sphagnum moss over the mesh, creating an even layer
- If you are using a central pipe, place it on top of the moss
- Roll the mesh to form a cylinder
- Secure it with zip ties every 4 inches (10 cm)
The moss pole should be firm, but not so tight that it squeezes out all the moisture from the moss.

Correct installation in the pot and securing the plant
Here is the key detail that makes all the difference: place the moss pole in the empty pot first, position the plant beside it (with the aerial roots facing the moss), and only then add the potting mix. This locks the moss pole in place and keeps everything aligned.
Use soft ties (old pantyhose cut into strips works well) to fasten the plant’s nodes against the moss. The aerial roots need to be in direct contact with the moist moss — that’s how the magic happens.
If you want to watch this moss pole step by step in real time, here is a video from the Jardim Onírico channel, showing the complete moss pole setup.
Differences between a sphagnum moss pole and a coco coir pole
This is a very common question. Coco coir is great for physical support and is more affordable, but it loses badly when it comes to moisture retention. Sphagnum moss can hold up to 20 times its own weight in water, while coco coir dries out quickly and becomes almost hydrophobic. And that’s without even going into tannin levels and other characteristics of coco coir, which would require an entire article.
In practice: plants grown on coco coir supports do well, but the leaves usually don’t reach the same impressive size that they achieve on a moss pole. It’s the difference between “good” and “extraordinary.”
How to maintain and care for the moss pole to ensure strong growth
Tricks to keep the moss consistently moist
The biggest challenge with a moss pole is not letting it dry out completely. Dry moss turns into a hydrophobic sponge — it repels water instead of absorbing it.
Some strategies that work well:
- Mist the moss pole with water (or a diluted fertilizer solution) 2 to 3 times a week
- Direct part of the watering from the pot toward the base of the support
- In very dry environments, wrap the support with plastic wrap for the first few days after planting (this creates a humid microclimate)

Using a simple drip system to make watering easier
I learned this tip in a gardening forum and it changed my routine: use a plastic bottle with a tiny hole in the bottom, filled with water, turned upside down at the top of the moss pole.
The water drips slowly and runs down through the moss, keeping it moist for days. It works almost like a free automatic irrigation system. It’s not very pretty, but it’s brilliant and highly efficient.
Common mistakes that keep your moss pole from working
After talking to some people who tried and said it “didn’t work,” I identified the most frequent mistakes:
- Support that’s too thin: With very little sphagnum moss, it dries out in a few hours. Ideally it should be at least 2.5 inches (6 cm) in diameter
- Not securing the aerial roots: If the root doesn’t touch the moss, it absorbs nothing. Fasten the plant’s nodes with soft ties
- Forgetting to water the moss pole: It needs watering independently of the potting mix. It’s not automatic
- Using decorative moss: That bright green moss is purely ornamental and does not work
As a reader recently commented: “The secret to a giant monstera isn’t just fertilizer, it’s vertical stability. When the plant feels that it’s ‘climbing’ something solid and moist, it understands that it can invest energy in larger leaves.” I couldn’t agree more.
Frequently asked questions about using supports on plants
Can I use decorative green moss on the support?
No. Decorative green moss is dyed and does not have the water-retention properties of true sphagnum moss. It’s only meant for visual finishing in arrangements, not as a living support for plants.
When is the best time to place the support in the pot?
The best time is during repotting, when you can position the moss pole in the center of the empty pot and arrange the plant’s roots around it. But if your plant is already established, you can still add the moss pole carefully—just anchor it close to the main stem and keep tying in new nodes as they grow.
How to take a cutting from a plant that has already climbed the moss pole?
This is the best part: the moss pole works like continuous air layering. The aerial roots that have grown into the moss are already mature and ready. Just cut the stem right below a node with roots, and you’ll have a perfect plant cutting, without having to wait for it to root in water.
It’s propagation made incredibly easy.

Transform your urban jungle with natural, efficient moss poles
After setting up my first moss pole, I never looked at my climbing plants the same way again. It’s not just about providing support — it’s about recreating their natural habitat and unlocking the full genetic potential of these plants.
The investment is low (moss, mesh and zip ties usually cost less than $10–$15 in total), but the results are on another level. If you grow a Monstera deliciosa, Philodendron, pothos or any other climbing aroid, give moss poles a try. Your only regret will be not having done it sooner.
And if you have questions or want to share your results, send me an email (contato@jardineiro.net). I love seeing the transformations that happen when we offer plants exactly what they need. Shall we create a true, thriving urban jungle together?