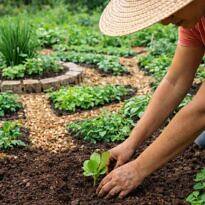
Your garden design is ready! Now what? You have the blueprint of your green dreams in hand, but how do you turn those lines on paper into a lush, real garden? How do you actually install the garden? Is it worth hiring professionals, or can you take on this challenge yourself?
Landscape installation, also known as “execution,” is a completely different stage from the design process. While planning unfolds in the realm of ideas and dreams, execution means getting your hands dirty, making practical decisions, and facing a series of challenges that aren’t always apparent on paper. Whether your project was developed by a professional landscape designer or you took on the planning yourself, it’s time to choose: hire a specialized company or do it yourself.
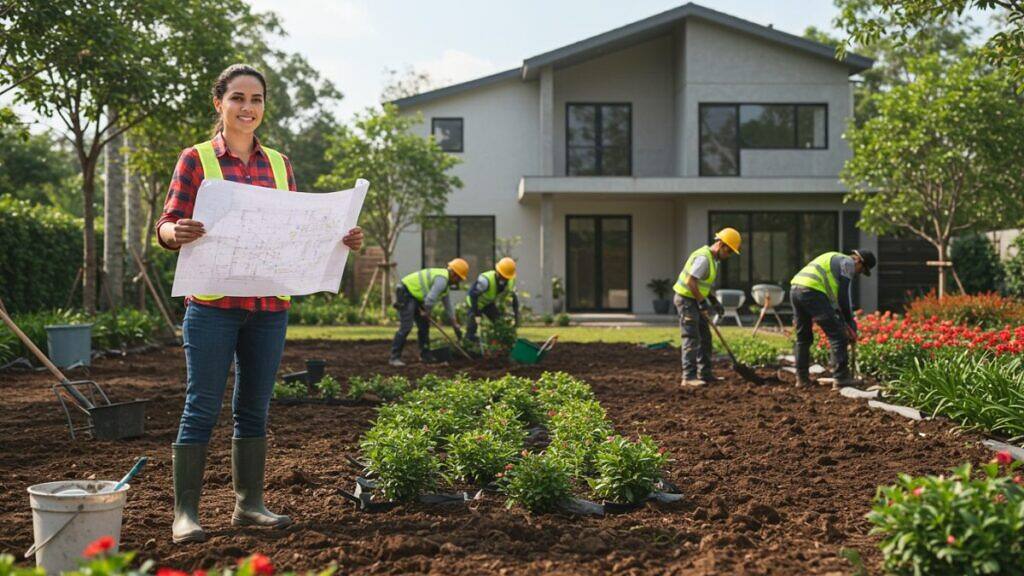
Professional Installation vs. DIY Execution
Hiring professionals gives you the assurance of technical expertise, knowledge of the right planting times, access to specialized suppliers, and skilled labor. The downside? The investment can be substantial, especially when your budget is already stretched thin from building your home.
Doing it yourself grants you more control over costs, flexibility with scheduling, and the personal satisfaction of creating with your own hands. However, it also demands time, physical effort, and technical know-how to avoid costly mistakes that could compromise the entire project.
Real-World Challenges of Installation
For most people, installing a garden after construction is far from ideal. You’re likely to encounter:
- Limited budget: After construction expenses, the funds left for your garden may be much less than you originally planned
- Disturbed site: Construction debris, cement residue, rocks, and unsuitable materials scattered throughout the area
- Depleted soil: Grading work removes the most fertile topsoil layer, leaving behind a compacted subsoil low in nutrients
- Soil compaction: Heavy equipment and material movement during construction typically leave the ground extremely hard-packed
- Drainage issues: Changes in the terrain may have created areas where water accumulates
- Improvised utilities: Water and electrical points that don’t exactly match the original design plans
Why Proper Installation is Crucial for Your Garden’s Success
A well-executed project can transform an ordinary space into a true oasis. On the other hand, poor installation can doom even the most well-designed garden to failure.
The difference between a thriving garden and one that withers away lies largely in the quality of execution.
During the installation phase, you will be laying the foundation for healthy plant growth for years to come. Every decision made at this stage—from soil preparation to choosing the right time for planting—will directly impact the final outcome.
What You Need to Know Before You Start
Before getting your hands dirty, it’s essential to understand that installing a garden is not just about placing seedlings in the spots marked on the design. It’s a process that involves logistics, technical knowledge of plants and soils, an understanding of construction for structural elements, and above all, patience to respect the timing of each phase.
The success of the installation depends on following a logical sequence of actions, having the right materials and tools, and being prepared to adjust the design according to the actual site conditions. In the next steps, you’ll discover exactly how to turn your design into reality, avoid the most common mistakes, and ensure that your garden has everything it needs to thrive.
Now that you’re aware of the challenges, let’s get to what really matters: the practical step-by-step to bring your garden to life. By following these nine steps in the correct order, you’ll be well on your way to creating the garden of your dreams.
Step 1: Site Preparation
Preparing the site is the foundation of any successful garden. Here, you’ll be correcting all issues leftover from construction and creating the ideal conditions for plants to grow.
Clearing and Grading
Start by removing all construction debris: pieces of concrete, bricks, mortar residue, plastic, and any material that isn’t soil. This cleaning should be thorough—even a small piece of leftover cement can hinder root development years down the road.
During clearing, check whether the grading matches the project specifications. Minor adjustments can also be made in the next phase, marking out planting beds and areas, but significant changes may require further earth movement. Remember, the land should have a gentle slope to allow rainwater to drain and prevent flooding, especially if your soil is mostly clay.

Weed Control
In areas with a heavy infestation of weeds, nutsedge, or invasive grasses, it may be necessary to carry out control measures before installation. These plants compete aggressively with young plants for nutrients and water, jeopardizing the establishment of your garden.
For chemical control, use specific herbicides and strictly follow the manufacturer’s instructions. Protect any existing trees and plants you wish to keep by covering them with plastic sheeting, or apply the product only with a brush to the invasive plants. Maintain a safe distance from preserved trees to avoid herbicide drift reaching their roots.
For less aggressive alternatives, you can use a flame weeder (torch) to burn weeds, which is particularly effective for grasses. Another option is to cover the entire area with black plastic for 60 to 90 days; this method eliminates invasive plants due to the absence of light. For smaller areas, manual removal remains a viable and completely organic option.
Soil Analysis
Once the area is cleared, collect soil samples from different spots in the yard. You can do a basic home analysis by observing the texture (whether it is heavy clay, sandy, or balanced) and testing drainage by pouring water and noting how long it takes to be absorbed.
For more accurate results, seek out a soil laboratory or an agricultural cooperative in your area. This investment is worthwhile, as you will learn precisely what amendments are needed in terms of pH, nutrients, and soil structure.
Step 2: Area Marking
With the site properly prepared and cleaned, it’s time to bring your plan from paper to reality. Before any infrastructure is installed, it’s crucial to mark all areas accurately—this ensures that pipes, cables, and drains are placed exactly where they need to be. If any earthworks are still required, this is the ideal moment.
Transferring the Plan to the Site
Use wooden stakes and string to outline the borders of garden beds, pathways, and designated areas. Work with precise measurements, using a tape measure to ensure proportions are maintained. If necessary, adjust the plan to suit the actual conditions of the site.
A valuable tip: use quicklime or spray paint (like those used on sports fields) to mark the definitive outlines on the ground. This will make the next steps much easier and help you keep your references clear during execution.

Marking Beds and Paths
Clearly define where each garden element will be located. Mark not only the beds, but also the exact width of paths, seating areas, and any structural features. These markings will serve as a guide for all subsequent steps.
Take this opportunity to walk through the space and experience the layout firsthand. Sometimes, a path that seemed sufficient on paper may feel too narrow or poorly positioned in reality. Making small adjustments now can significantly improve the final result.
Step 3: Installing Infrastructure
Now that all areas are accurately marked out, you can install the infrastructure with complete precision. This sequence helps avoid rework and ensures each element is placed exactly where it belongs, faithfully following your original design.
Irrigation System
If your design includes automated irrigation, now is the time to install it. Start with the main piping, always burying pipes at least 12 inches (30 cm) deep to prevent future damage. Mark the pipe routes clearly for future reference.
Install sprinklers, micro-sprinklers, or drip systems according to the specific needs of each area. Remember that different plants require different amounts of water, so group plants with similar water requirements within the same irrigation zones.
 Lighting and Electricity
 Lighting and Electricity
The electrical installation should also be completed at this stage. Run wires through buried conduits, always complying with safety regulations.
Place power outlets in strategic locations not only for lighting, but also for future needs such as water pumps or electric tools.
When planning lighting, consider both the functional aspects (such as safety along pathways) and aesthetic purposes (highlighting plants and decorative elements). Position the light fixtures with the future growth of the plants in mind.
Drainage
If your site suffers from drainage issues, address them now. Install French drains in areas prone to water accumulation, or create discreet runoff channels blended into the landscape. Poor drainage can kill plants and render portions of the garden unusable.
Step 4: Preparing the Garden Beds
Now comes one of the most crucial steps: preparing the soil in the planting beds to receive the new plants. This is the time to correct all problems identified during your soil analysis.
Soil Amendment
Start by loosening the soil, digging down to at least 16 inches (40 cm). Compacted soil inhibits proper root development and limits water and nutrient absorption.
If the soil is heavy with clay, add coarse sand and organic material to improve drainage. If it’s too sandy, incorporate clay and organic matter to boost water retention. The ideal soil drains well while retaining enough moisture for plants.
Adjust the pH as indicated in your soil analysis. Most plants prefer a pH between 6.0 and 7.0. Use agricultural lime to raise pH or sulfur to lower it, always following technical recommendations for quantity.
Important: If you use lime, wait at least 30 days (ideally 6 months!) before planting, so the product can dissolve and neutralize the soil’s acidity. This waiting period is essential to avoid root burn. To speed up the process, keep the soil slightly moist during the waiting period.

Fertilization and Potting Mix
Incorporate high-quality organic matter into the soil: well-rotted manure, compost, or worm castings. Organic materials improve soil structure, increase its capacity to retain moisture, and gradually supply essential nutrients.
Never use raw dug-up topsoil from construction sites or suspicious “black soil” that someone tries to sell you. These materials are often collected from natural forested areas and, despite being fertile, they contain a large number of weed seeds just waiting for the right opportunity—your garden!—to germinate. Furthermore, this removal is an environmental crime. The same applies to manures; if not properly composted, they can also contain weed seeds and may hinder rather than help your garden.
Also, add mineral fertilizers as recommended by your soil analysis. Do not hesitate to consult an agronomist to assist you with this task. Thoroughly mix all components to create a homogeneous and nutrient-rich potting mix. The final depth of the prepared mix should be at least 12 inches (30 cm) for herbaceous plants and 20 inches (50 cm) for shrubs and trees.
After preparation, water abundantly and allow the soil to rest for a few days before planting. This allows the components to integrate and the pH to stabilize. However, don’t wait too long, as some soluble fertilizers can be leached by rain before plants are able to absorb them.
Step 5: Construction of Structural Elements
Before starting the planting process, build all the structural features outlined in your landscape design. Completing this phase first is essential to avoid damaging the plants during the construction of these elements.
Paths and Paving
Begin by building pathways, carefully following the marked measurements. For stone or brick paths, create a solid base using gravel and sand, making sure everything is properly leveled. Well-constructed paths are crucial for the garden’s functionality and make future maintenance easier.
If your project includes different types of paving, start with those areas that require heavy equipment, such as concrete or large stones. Leave the more delicate paving for last to prevent damage during garden installation.

Retaining Walls and Edgings
Build retaining walls, raised planters, and landscape edgings as specified in the plan. These features do more than define the garden areas; they are also vital for the structure and proper drainage of your beds.
Use quality materials and appropriate building techniques. Remember that these elements will be in constant contact with moisture and need to be durable.
Install drains behind retaining walls to prevent future issues caused by water accumulation.
Step 6: Strategic Planting
Now comes the most anticipated stage of the process: planting! But take note—there is a correct order to planting that can make a significant difference in the final outcome.
Planting Order by Size
Always start with the largest plants: trees and palms. These require more space for planting and, if planted last, could damage smaller plants. It is also easier to position the smaller plants once the larger ones are in place.
Next, plant shrubs and medium-sized specimens. Leave herbaceous plants, groundcovers, and grasses for last. This logical sequence makes the work more efficient and reduces the risk of damage during garden installation.

Proper Planting Techniques
For each plant, dig a hole twice the width of the root ball, but only as deep as necessary for the root collar to remain at soil level. Never plant too deep, as this can suffocate the roots and hinder growth.
Carefully remove the plastic bag or break the pot, preserving the roots as much as possible. If the roots are circling or tangled, make a few shallow cuts to encourage them to spread into the surrounding soil.
After planting, water thoroughly and add a layer of mulch around the plant. Maintain a mulch-free space near the stem to prevent fungal issues and pest infestations.
Step 7: Finishing Touches and Details
Finishing touches are what transform a simple installation into a professional landscaping project. These details make all the difference in the garden’s final appearance.
Mulch
Apply mulch to all garden beds, leaving only a small space free around the base of each plant. Mulch helps retain soil moisture, suppresses weed growth, and gives the garden a polished, professional look.
Choose the type of mulch best suited for each area: pine bark for acid-loving plants, gravel for drought-tolerant species, or organic matter for vegetable gardens and tropical landscapes. The ideal thickness is 2 to 3 inches (5 to 8 cm).

Decorative Elements
Install decorative elements such as ornamental stones, sculptures, or fountains as planned in your design. Carefully position these features, considering how they’ll be viewed from various angles and how they integrate with the surrounding plants.
Adjust the lighting to highlight both plants and decorative pieces. Well-designed lighting can completely transform the way your garden is perceived at night.
Step 8: Initial Maintenance
The job isn’t over after planting. The initial months are critical for your plants to establish themselves and for the overall success of garden installation.
Initial Care
Monitor plant development daily during the first few weeks. Watch for signs of water stress, pests, or diseases. Newly planted specimens are especially vulnerable and require extra attention.
Prune as needed to shape the plants, removing damaged or poorly positioned branches. Keep garden beds free from weeds, which compete for nutrients and moisture.

Watering Schedule
Set a watering routine suited to each type of plant. Newly planted species usually require more frequent watering until they become established. Adjust how often you water according to the season and current climate conditions.
If you have installed an automated irrigation system, make the necessary adjustments based on plant response. Ensure that all areas are being watered sufficiently and that there’s no waste.
Step 9: Necessary Adjustments
A garden should be treated as a living element that continuously changes over time. The initial installation is just the beginning of an ongoing process of adaptation and improvement.
Natural Garden Adaptations
Not every plant listed in your original landscape design will thrive in its assigned spot, and that’s completely normal. Factors such as microclimate, actual sun exposure, drainage, and plant interactions may differ from what was initially anticipated.
Be prepared to make replacements when necessary. If a plant does not adapt well, it should be replaced with another that has similar features but is better suited to the site’s specific conditions. This does not indicate a failure in garden establishment, but rather represents a natural part of the establishment process.
Growth and Development
As plants mature, it will be necessary to adjust spacing, perform formative pruning, and even relocate specimens. Plants that initially seemed well placed may need more room or less competition for light.
Also observe how plants interact with each other. Some may grow faster than expected, shading nearby plants that require more sunlight. These adjustments are part of the garden’s natural evolution.
Continuous Improvements
Use the first few years after installation to monitor how the space is used, which areas require more or less irrigation, and locations where new elements or plants could be added. A mature garden is rarely identical to the original design, and that is a positive outcome.
Keep photographic records of the garden’s progress. This will help document the project’s success and identify areas for improvement. Remember: a well-executed garden is one that improves over time, adapting to users’ real needs and the site’s unique characteristics.

Common Mistakes When Establishing Gardens
Knowing the most frequent mistakes can save time, money, and frustration during landscape installation. Here are the main pitfalls and how to avoid them:
Skipping Preparation Steps
The most common mistake is rushing and skipping crucial stages such as soil analysis or infrastructure installation. Planting in poorly prepared soil, or installing irrigation after planting, always leads to extra work and stressed plants.
How to avoid it: Follow each step of the process carefully, even if it feels time-consuming. Every stage is vital for long-term success.
Planting Too Close Together
Beginners often plant everything too close, aiming for immediate results.
This leads to unnecessary expenses, excessive competition among plants, poor development, and the need for future transplanting.
How to avoid: Observe the spacing recommended in your design, keeping in mind the mature size of each plant. It’s better to have a garden with initial gaps that will fill in naturally over time.
Improper Irrigation
Watering all plants the same way is another serious mistake. Different species have different water requirements, and overwatering can be just as harmful as underwatering.
How to avoid: Group plants according to similar water needs and set specific irrigation schedules for each area. Monitor your plants and adjust schedules as needed.
Ignoring the Microclimate
Disregarding the specific conditions of each area (shade, wind, humidity) leads to planting species that are not suitable for the location.
How to avoid: Observe your garden at different times of the day and throughout the year. Choose plants that are well-suited to the actual conditions of each microenvironment.
Neglecting Initial Maintenance
Neglecting the garden right after planting guarantees failure. The first few weeks are crucial for plants to become established.
How to avoid: Dedicate daily time to observe and care for your garden during the first weeks. Addressing small problems early prevents major losses later on.
Incorrect Planting Techniques
This set of technical mistakes can seriously compromise plant health and development:
- Burying the root crown: Planting too deep suffocates the roots and can kill the plant. The root crown should always be level with the soil surface.
- Failure to remove containers: Leaving behind plastic bags, pots, or mesh from seedlings restricts natural root development.
- Shallow soil preparation: Preparing only the first few inches of soil results in plants with shallow root systems and low resistance.
- Poor timing: Planting during periods of climate stress (extreme heat, drought, frost) jeopardizes establishment.
How to avoid: Learn the correct planting techniques, prepare the soil to an adequate depth (at least 12 inches [30 cm]), always remove all packaging, and select appropriate seasons for each plant type.
Buying Low-Quality Plants
Cutting costs on seedlings is a lost investment. Weak, old, diseased, or pest-ridden plants can jeopardize your entire garden.
How to avoid: Always buy from reputable suppliers. Choose healthy, vigorous plants, even if they cost a little more. The initial savings aren’t worth the risk.
Not Taking Plant Growth into Account
Many landscape projects work well at first but can cause problems once the plants reach their mature size.
How to avoid it: Research the final size of each species and incorporate this into your planning. Think about how the garden will look in 5 or 10 years, not just at the moment of planting.
FAQ – Frequently Asked Questions
When is the best time to start a garden installation?
The best season depends on your region, but generally, transitional months (spring and fall) are ideal. Avoid periods of extreme heat or frost. In tropical regions, the beginning of the rainy season is excellent for establishing plants.
Is it possible to install a garden in phases?
Yes! Breaking the project into phases is a smart strategy, especially if you’re working with a limited budget. Start with the most visible or functional areas, then expand gradually. Always keep the implementation consistent with the original design.
How long does it take for a garden to look “finished”?
A garden is never truly finished, but the main structure is usually established within 6 months to 1 year. Trees and shrubs may take 2–3 years to reach satisfactory development. Tropical gardens tend to establish faster than temperate-climate gardens.
Can I make changes to the design during installation?
Minor tweaks are normal and even advisable when you notice something may not work as planned. Major changes should be considered carefully to avoid disrupting the overall harmony. Keep a record of all changes for future reference.
How can I tell if a plant isn’t adapting well?
Symptoms like yellowing leaves, slow growth, persistent wilting, or pest outbreaks may indicate poor adaptation. Observe the plant for a few weeks before making a final decision. Sometimes, it just needs more time to establish.
Is it worth hiring a professional for certain stages?
Absolutely! Phases such as electrical installation, lighting, complex irrigation systems, or earthworks may require technical expertise. Hiring professionals for these tasks can save money in the long run.
How do I calculate the amount of materials needed?
Use your project measurements to calculate garden bed areas and volumes of soil and potting mix (substrate). Always add 10–15% extra to account for losses and adjustments. For plants, get 5–10% more for possible replacements.
What if I don’t have much time for maintenance?
Choose native and hardy plants that require minimal care. Invest in a quality automated irrigation system and use plenty of mulch to suppress weeds.
Design your garden with low maintenance in mind from the very beginning.
Can I make use of plants already on the property?
Absolutely! Healthy trees and shrubs can be integrated into your new design. Assess their health, whether their position suits the project layout, and if the species match the intended style. Sometimes, a well-executed pruning can turn an existing plant into a garden centerpiece.
How much should I invest in landscaping installation?
Costs can vary widely depending on the project’s complexity, regional differences, and material quality. As a guideline, allocate at least 30% of your budget for soil preparation and infrastructure, 40% for plants and materials, and 30% for labor (if hiring help). Always keep a 20% reserve for unforeseen expenses.
Are you ready to get your hands dirty? Let’s do it!
Creating your own garden is a challenging but truly rewarding journey. Nothing compares to the satisfaction of watching something grow and thrive that you planted with your own hands. Every maturing plant, every flourishing bed, stands as proof of your care and dedication. Your garden will become not just a beautiful space, but a reflection of your personality—a haven where you connect with nature.
Always remember: There is nothing wrong with realizing a project is more complex than you first imagined. If, during the process, you find that some phases require specialized knowledge or the scope of work exceeds your current skills, hiring a professional gardener or landscape designer is a smart decision, not a setback. What matters most is that your garden is installed to a high standard and brings you lasting happiness. Whether you do everything on your own or seek professional support for certain stages, the final result will be yours: a unique garden that reflects your dreams and brings you years of enjoyment and delight.