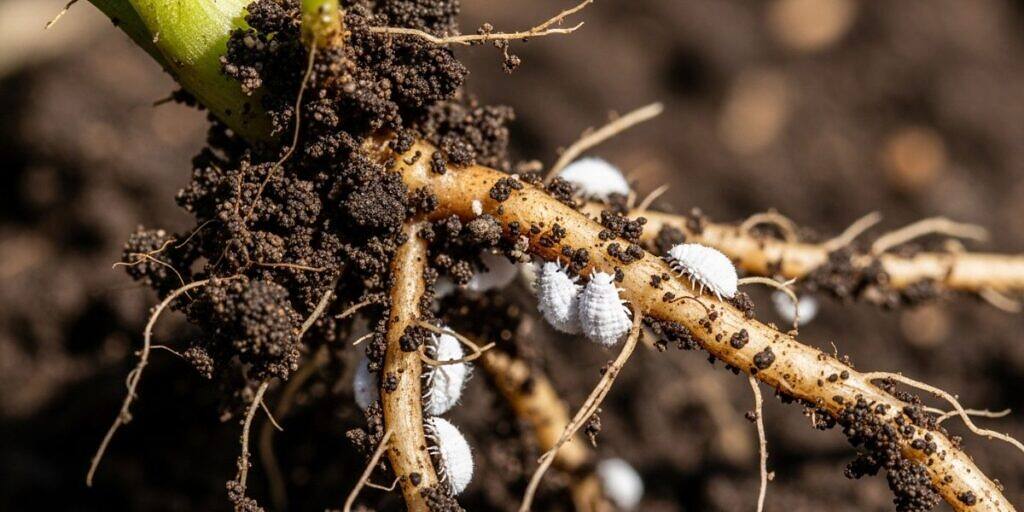
I noticed that some of my succulents were wilting even though I was watering them properly. At first I thought it was the heat, but over time I started to see yellowing leaves and stunted growth, yet no mealybugs on the foliage. When I unpotted the first plant, already desperate and thinking about changing the potting mix, I almost had a heart attack: the roots were covered with white, cottony masses, partly powdery, as if someone had pressed bits of cotton into the root ball. It was root mealybug — one of the most discreet and devastating pests I’ve ever dealt with.
The worst part is that while you are busy looking for the problem on the leaves, they are down below, quietly sucking the life out of the plant. And if you see ants moving around your pots, bad news: they are protecting (and spreading!) the pest in exchange for the sugary honeydew that mealybugs produce. It’s a perfect symbiosis — for them.
What is root mealybug and why is it so dangerous?
Root mealybug is an insect in the family Pseudococcidae, mainly in the genus Rhizoecus spp. Unlike the mealybugs that attack stems and leaves, this type lives exclusively in the root system and in the potting mix, making it practically invisible until the damage is already severe.
They feed on the sap of the roots, gradually weakening the plant. Their bodies are covered with a waxy layer that looks like cotton or white powder — this “armor” protects them from predators and makes contact insecticides much less effective.
Plants most at risk
In my collection, the main victims were:
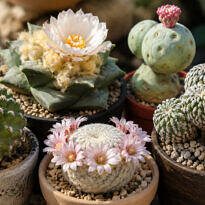
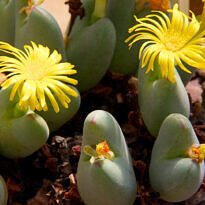
- Succulents (Echeveria, Crassula, Sedum)
- Cacti (especially slow-growing species)
- Orchids (particularly those grown in pine bark)
- African violets and other small potted plants
- Desert roses (Adenium obesum): (they seem to be an absolute magnet for these pests)
Research on ornamental plants indicates that container-grown plants are more susceptible because the confined environment favors the rapid multiplication of the pest, and the lack of natural predators indoors makes a root mealybug infestation even harder to control.
How to identify an infestation: warning signs
The biggest problem with root mealybugs is that by the time you notice something is wrong above the soil line, the underground infestation is already well advanced. I learned to watch for three categories of signs:
Symptoms on the plant
- Chlorosis: yellowing leaves without any obvious cause
- Persistent wilting: even after watering, the plant does not regain turgor
- Stunted growth: the plant simply stops growing, even during its ideal growing season
- Leaf drop: lower leaves detach easily with a light touch
Visible signs in the potting mix
When you suspect a root mealybug problem, it is time to investigate. Gently remove the plant from its pot and look for:
- White, cottony masses attached to the roots
- Waxy residue or white powder on the inner surface of the pot
- Roots that look “dusty” or covered with a whitish film
- Tiny mobile white specks (the young root mealybugs)
Important tip: Many people mistake this for a fungal issue. If you crush the white mass and a yellowish or orange liquid comes out, it is a root mealybug. Fungi do not “bleed.”

The critical role of ants
Here is the most revealing sign: ants going in and out through the drainage holes of the pot. They are not there by accident. Root mealybugs produce a sugary honeydew, and in exchange for this resource, ants protect them from predators and even transport the nymphs to other containers.
Once I started paying attention to this behavior in my collection, I realized that controlling ants is half the battle against root mealybugs. They are literally the “herders” of this pest.
Step-by-step guide to eliminating this pest for good
After losing some plants by trying incomplete methods, I learned that treatment against root mealybugs needs to be thorough and aggressive. Here is the protocol that saved my collection:
1. Immediate isolation
As soon as you identify a plant infested with root mealybugs, place it in quarantine, away from the rest of your collection. Ants can carry the nymphs, and the insects themselves can slowly move through the potting mix of adjacent containers.
2.
Complete unpotting and inspection
Put on gloves and remove the entire plant from the pot. Remove ALL of the old potting mix — do not try to reuse any of it. I made the mistake of just “shaking the root ball a little” the first time. The result? The root mealybugs were back in three weeks.
Proper disposal: Place the contaminated potting mix in a sealed plastic bag and throw it in the household trash. Never, under any circumstances, add it to your compost. Mealybug eggs can survive the typical home composting process.
3. Thorough root washing
Take the plant to a sink or outdoor area and wash the roots under running water, mechanically removing all visible white clusters. Use an old toothbrush to gently scrub the thicker roots.
Note: If the affected plants are succulents, it can be much more effective to behead them (top cutting) rather than trying to remove all the root mealybugs. Combine beheading with the therapeutic bath below to eliminate the problem for good.
4. Therapeutic bath: the decisive soak
Prepare a basin with an insecticidal solution and immerse the entire root system for 15–20 minutes. I have tested two approaches:
Chemical option (more effective): A systemic insecticide based on Imidacloprid or Thiamethoxam. The plant absorbs the active ingredient, and any root mealybug that tries to feed on the roots will die over the following days. Keep yourself, your family, your plants, and your pets safe: always consult a licensed horticulture or pest‑management professional when using chemical insecticides. They will indicate the best product, dosage, and correct application frequency, as well as how to protect yourself during treatment.
Organic option: Mix 0.7 fl oz (20 ml) of neem oil + 0.17 fl oz (5 ml) of mild dish soap in 1 quart (1 liter) of water. Neem oil works by contact and suffocation, but it needs to be reapplied every 5–7 days.
5. Pot sterilization
While the plant is soaking in its therapeutic bath, wash the pot with a 10% bleach solution (1 part bleach to 9 parts water) or 70% isopropyl alcohol. Scrub all corners thoroughly, including the drainage hole.
6. Repotting with fresh mix
Use fresh, sterilized potting mix. For succulents and cacti, I prefer a very well‑draining blend (50% commercial potting mix + 30% coarse sand + 20% perlite).
Add a layer of diatomaceous earth mixed into the potting mix — this siliceous powder dehydrates any surviving root mealybug that tries to establish itself again.
Look for Food-Grade Diatomaceous Earth at garden centers or online. Wear a mask when handling it, as the fine dust can irritate the lungs.
Control methods: chemical vs. organic
From my experience, mild infestations of root mealybugs respond well to organic control, but advanced cases require systemic chemicals. To be honest, I have lost plants trying to stay “all natural” when the situation clearly called for heavier artillery.
Systemic insecticides: the most effective solution
Products based on Imidacloprid or Thiamethoxam are absorbed by the plant and move through the sap. When the root mealybug feeds, it ingests the toxin. The advantage is that you do not need to hit each insect individually.
How to apply: Dilute according to the label directions (usually 0.04 oz for 34 fl oz of water — 1 g for 1 liter of water) and drench the potting mix after repotting. Repeat after 15 days to target the second generation that was still in the egg stage.
Caution: These products are toxic to bees and other pollinators. Avoid using them on flowering plants, especially those kept outdoors.
Organic control: patience and consistency
Neem oil has been my long-time ally against root mealybugs. It works by contact, suffocating the insects and disrupting their reproductive cycle. However, it requires frequent reapplications (every 5 days, for 3 weeks).
Homemade mix: 0.7 fl oz of neem oil (20 ml) + 0.17 fl oz of potassium soap or mild dish soap (5 ml) + 34 fl oz of water (1 liter). Spray the potting mix and water around the base of the plant. The soap helps break the waxy coating of root mealybugs.
Diatomaceous earth: a physical barrier
This siliceous powder works like “microscopic ground glass” for soft-bodied insects. When a root mealybug crawls over the diatomaceous earth, it tears the waxy layer and the insect dehydrates. Mix about 10% diatomaceous earth into the potting mix when repotting.

Cleaning and preventing re-infestation
Getting rid of the root mealybug infestation is only half the work. The real challenge is making sure it does not come back.
Here are the precautions I follow religiously against root mealybug:
Tool and container sterilization
After handling any suspicious plant, I disinfect pruners, knives, and spatulas with 70% alcohol or isopropyl alcohol. I leave them submerged for 5 minutes and let them air-dry. Reused pots are soaked in a 10% bleach solution for 30 minutes.
Quarantine for new plants
Every new plant is kept isolated for 30 days before joining the rest of the collection. There are countless reports in gardening forums of people who brought home a single succulent from a market and, within two months, the entire shelf was infested. Root mealybug can hitchhike in apparently healthy plants.
Ant control
Use physical barriers (double-sided tape around benches and shelves) or ant-specific baits. Without ants, root mealybug loses about 80% of its ability to spread.
Heat treatment: advanced method
For experienced collectors, there is a technique widely used by orchid growers: immersing the roots in water at exactly 120°F (49°C) for 10 to 15 minutes. This temperature kills root mealybugs and their eggs but does not damage the root system of most plants.
Use a kitchen thermometer to monitor the temperature accurately. Above 122°F (50°C), you literally cook the roots. Below 118°F (48°C), the eggs survive. It is a delicate method, but highly effective against root mealybug when carried out correctly.
Common mistakes when treating root mealybug
I have made all these mistakes (so you do not have to):
Treating only the foliage
Spraying insecticide on the leaves does absolutely nothing. Root mealybug lives exclusively below the soil surface. It is like trying to put out a basement fire by hosing down the roof.
Reusing potting mix that was just “dried in the sun”
Many gardeners report leaving old potting mix “resting in the sun for a week” and then reusing it. Root mealybug eggs are extremely resilient and can survive weeks of drought. According to the Royal Horticultural Society, the eggs can remain viable for months under adverse conditions. A more reliable option is to gently heat slightly moist potting mix in the oven or microwave until the center reaches at least 140°F (60°C).
Giving up after the first treatment
Root mealybug has a life cycle of about 4 to 6 weeks. If you treat once and stop, the surviving eggs will hatch and reinfest the plant. You need at least two applications, spaced 15 days apart, to truly control root mealybug.
Safety and use of PPE
Whenever you handle chemical pesticides, use nitrile gloves and a disposable mask. When working with diatomaceous earth, a mask is mandatory — the dust is extremely fine and can irritate the lungs.
Work in well-ventilated areas and keep children and pets away during application. Wash your hands thoroughly after handling and never reuse pesticide containers for any other purpose.
Frequently asked questions
How do I know if the white powder in the pot is fungus or root mealybug?
Crush a small portion between your fingers (while wearing gloves). If it releases a yellowish or orange liquid, it is root mealybug. Fungi do not release liquid when crushed. In addition, root mealybugs will move slowly when disturbed — fungi are static.
Can I save a succulent with roots completely infested by the pest?
Yes, but with some caveats. If there are still healthy roots (white and firm), follow the full treatment protocol. If 100% of the roots are dark and mushy, cut a healthy leaf or rosette and propagate it. Discard the rest of the plant to prevent further contamination.
How long should I keep the plant in quarantine after treatment?
I recommend 30 days of monitoring. I unpotted some treated plants after 15 days to check, and I still found newly hatched nymphs. I only returned them to the collection after one full month without any sign of root mealybug reinfestation.
What is the ideal frequency for applying systemic insecticide?
Make the first application right after repotting. Repeat after 15 days to target the second generation. Avoid continuous monthly applications, as this can create resistance in the pest and stress the plant.
How do root mealybugs get into my pots?
The main routes are:
- Contaminated potting mix: purchased or reused without sterilization
- New plants: already infested when you bring them home
- Ants: which transport the nymphs between pots
- Contaminated tools: used on infested plants and then on healthy ones
Constant vigilance is the best control
These days, I unpot my succulents every six months for preventive inspection. Does it seem like a lot of work? It is. But it is far less frustrating than losing entire plants to root mealybug because of neglect. I use the opportunity to refresh the potting mix. I do the same with desert roses, which are also quite susceptible. I have learned that gardening is not just about watering and fertilizing — it is about observing, anticipating, and acting quickly.
If you suspect root mealybugs in your collection, do not wait for the plant to wilt completely. Remove the plant from its pot, inspect the root ball, and treat it immediately. Use systemic insecticides for severe infestations, keep ant populations under control, and never, ever reuse any potting mix that seems suspect.
Your collection deserves this level of care. And your plants will show their appreciation with firm foliage, vigorous growth, and healthy roots—exactly as they should be.