Have you ever been captivated by a plant at a friend’s house or in a public garden and wished you could have one just like it? Or perhaps you have a special plant in your garden that you would like to propagate? The good news is that you don’t need to buy new plants — just learn the art of propagation by cuttings and discover how to successfully root any branch, transforming a mere branch into a thriving, fully-formed plant.
Propagation by cutting is one of the most rewarding and economical techniques in gardening. Unlike growing from seeds, cutting allows you to create exact clones of the mother plant, preserving all the characteristics you love in it. This ancient technique, enhanced by modern science, enables transforming a part of the plant into a new complete individual.
In this comprehensive guide, you will discover everything from a simple and universal method to advanced professional secrets that teach exactly how to root any branch. It doesn’t matter if you are a first-time gardener or an experienced enthusiast looking to improve your skills — here you will find valuable knowledge to master this incredible ability. Shall we proceed?

Universal Cutting Method (Quick Solution)
Before we dive into the advanced techniques, let’s start with a basic method that works for most easily rooted plants, such as coleus, mint, lavender, succulents, hibiscus, and many others.
Required materials:
- Clean and sharp pruning scissors
- Small pot or container with drainage holes
- Light potting mix (50% plant substrate and 50% perlite or vermiculite)
- Transparent plastic bag or cut PET bottle
- Rooting hormone (optional, but recommended)
- Clean water at room temperature
Universal Method: Step-by-Step Instructions
- Select the right branch: Choose a healthy branch, without flowers, 4-6 inches (10-15 cm) long with at least two nodes (points where leaves connect to the stem).
- Prepare the cut: Cut just below a node at a 45-degree angle using clean and sharp scissors. The angled cut increases the surface area for water absorption and root development.
- Prepare the cutting: Remove the lower leaves, retaining only 2–3 leaves at the top.
If the remaining leaves are large, cut them in half to reduce water loss through transpiration. - Apply rooting hormone (optional): Dip the cut end into rooting hormone powder or liquid. Gently tap to remove the excess.
- Plant the cutting: Make a small hole in the pre-moistened potting mix using a pencil or wooden skewer. Gently insert the cutting into the hole and lightly press the potting mix around it.
- Create a mini-greenhouse: Cover the pot with a clear plastic bag or use a cut PET bottle as a dome to maintain humidity. Leave a small opening for ventilation.
- Placement: Place in a location with indirect light, avoiding direct sunlight. The ideal temperature is between 64-75°F (18-24°C).
- Initial care: Keep the potting mix moist, but not waterlogged. Occasionally spray water on the leaves. Remove the cover for 30 minutes daily for air circulation.
In 2-4 weeks, depending on the species, you should notice signs of rooting. The emergence of new leaves or shoots is a reliable indicator that rooting is underway. Nevertheless, avoid pulling the cutting to check—this could damage roots still in formation.

Ready! This simple method is sufficient to propagate most common houseplants and many garden plants. Knowing how to root any branch with this basic method is the first step to becoming a more independent and creative gardener.
Did everything right and your branch didn’t take?
Were you able to root your branch with the simple method? Great! But if you are trying to root a difficult branch or want to delve deeper into the technique of cuttings for even better results, keep reading. In the following sections, we will share professional techniques and secrets that nurserymen don’t tell—revealing exactly how to root any branch, even the most challenging ones.
Plants like olive trees, rose bushes, many fruit trees, and valuable ornamental species require more specific approaches for successful rooting. Moreover, the advanced techniques we will explore can drastically increase your success rate, even with the most “stubborn” plants.
The Fundamentals for Success
Before we delve into professional secrets, it is essential to understand the basic principles governing the rooting process. This knowledge will serve as the foundation for all the advanced techniques we will discuss later.
Understanding the Rooting Process
The rooting of cuttings is a fascinating phenomenon that involves several physiological processes:
- Wound healing: When a branch is cut, the plant reacts by forming a layer of cells called callus. Although the callus is not a prerequisite for rooting (as was once believed), it indicates that the healing process is occurring.
- Cell differentiation: Cells near the vascular cambium (growth tissue) near the cut are stimulated to transform into root precursor cells. This process is regulated by plant hormones, mainly auxins.
- Development of root primordia: Small growth points of roots begin to form within the stem tissue.
- Emergence of roots: Newly formed roots break through the stem tissue and emerge into the external environment.
For this process to occur successfully, the cutting needs to maintain a proper balance between water (avoiding dehydration, but also excessive moisture), stored nutrients, temperature, and hormonal levels.

Types of Cuttings
There is not a single type of cutting. Depending on the plant and the time of year, different types of plant material can be used:
- Herbaceous cuttings: Taken from non-woody and tender parts of plants. Easy to root, but they dehydrate quickly. Ideal for plants like coleus, begonias, and impatiens. They generally root in 1-2 weeks.
- Semi-woody cuttings: From partially woody branches. Perfect for ornamental shrubs, roses, and perennial plants. Average rooting time: 3-5 weeks.
- Woody cuttings: From mature wood. Used for fruit trees, vines, and ornamental shrubs. It can take from 6 weeks to several months to root.
- Leaf cuttings: Consist only of leaves or leaf segments. Mainly used for rex begonias, African violets, and succulents. Variable time: generally 3-4 weeks.
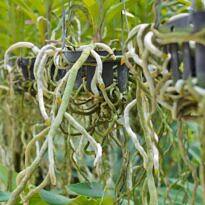
- Root cuttings: Root segments used in plants that naturally sprout from the roots, such as blackberries, raspberries, and locust trees.

Best times for each type of cutting
- Herbaceous cuttings: Spring and early summer.
- Semi-woody cuttings: Late summer and early fall.
- Woody cuttings: During dormancy, from late fall to early spring.
- Root cuttings: Late winter or early spring.
Selection of the ideal plant material
- Health state: Use only healthy parent plants.
- Vigor: Branches with moderate growth root better.
- Age of the parent plant: Younger plants offer better potential.
- Position on the plant: Branches from the middle part usually have greater success.
- Type of branch: Prefer vegetative branches without flowers.
- Nutritional reserves: Thicker branches better support the process.
Understanding these fundamentals will provide the necessary base to comprehend and effectively apply professional secrets on how to root any branch. Understanding the “why” behind each technique allows them to be precisely adapted to each species.
Understanding the fundamentals of rooting is the first step, but there are also various practical strategies that can greatly improve your results. Next, you will learn about 16 tricks used by professionals and experienced growers—techniques that are not usually covered in basic guides but make all the difference when rooting more demanding branches or accelerating the process. These solutions are simple, often surprising, that help turn knowledge into practice with more efficiency.

17 Professional Secrets to Root Any Plant Cutting
1. The Strategic Wounding Technique
Experienced professionals know that the secret to successful propagation often lies in the invisible details—such as localized activation of a plant’s internal tissues. One such detail is controlled wounding, also known as cambial scarification.
The technique involves making two small vertical cuts of 0.4 to 0.8 inches (1 to 2 cm) at the base of the cutting, positioned on opposite sides. This exposes the cambium—the tissue responsible for regeneration and the transport of hormones and nutrients.
This procedure offers several benefits:
- Increases the contact surface between the cutting and the rooting hormone applied.
- Stimulates the formation of multiple roots, as the injuries act as physiological triggers for the process of cellular differentiation.
- Facilitates the absorption of water and nutrients through the increased exposed area to the substrate.
This technique is particularly effective in woody cuttings and those difficult to propagate, such as olive trees, rose bushes, and various fruit trees. When combined with the correct use of hormones, the results can be significantly superior to traditional methods.
2. Hot Water Bath to Break Dormancy
Not all cuttings respond immediately to the rooting process, especially when collected during winter or from deciduous species. This is due to physiological dormancy, a natural state of metabolic inactivity.
To overcome this barrier, nurserymen use the hot water bath—an effective and low-cost thermal stimulation technique.
The method consists of:
- Submerging the base of the cutting in warm water, between 104 and 113°F (40 and 45°C), for a period of 30 to 60 minutes.
- Use a thermometer to ensure the appropriate temperature, without exceeding 122°F (50°C), which can damage the tissues.
This heat treatment causes the following physiological effects:
- Activation of enzymes involved in cellular metabolism and root differentiation.
- Breaking of dormancy by simulating spring warming that normally awakens dormant tissues.
- Improvement in hormone absorption when applied before treatment with rooting agents.
This technique is particularly indicated for branches collected outside the ideal season or for species such as Prunus, Ficus, and various tropical and temperate fruit trees.
3. The “Strategic Cooling” Technique
This is a method used by industrial nurseries, especially for temperate climate species:
- After preparing the cuttings with hormone, place them in sealed plastic bags
- Store in the lower part of the refrigerator (39-43°F [4-6°C]) for 48-72 hours
- Only then plant them in the rooting substrate
This controlled thermal shock stimulates the natural production of indoleacetic acid (IAA) and other auxins by the plant, in addition to reducing metabolism and initial stress. The result is more uniform and vigorous rooting, especially for roses, apple trees, and other temperate species.
4. Induction Technique through Etiolation
Few gardeners are aware of the powerful effects of pre-cut etiolation — a professional strategy that anticipates rooting by “reprogramming” the plant tissue even before the cutting of the stake.
The process is simple yet effective:
- Wrap the branch segment that will be turned into a cutting with aluminum foil or black tape.
- Keep this cover for 3 to 4 weeks, completely blocking light from entering the area.
This shading induces a series of physiological changes in the branch:
- Reduction in lignification — the base of the branch remains softer and more flexible, facilitating root emergence.
- Accumulation of auxins and other growth hormones in the shaded area, predisposing cells to root differentiation.
- Decrease in local photosynthesis, which reduces tissue rigidity and increases its plasticity.
This technique is particularly recommended for woody species, flowering shrubs, fruit plants, and any plant that shows resistance to rooting through traditional cuttings. When combined with strategic cuts and the use of hormones, the results are impressive.
5. Correct Post-Collection Hydration + Vitamin C
After cutting, the cuttings quickly begin the oxidation and dehydration process, compromising their rooting ability. To avoid this, immediately immerse the cuttings in clean water with ascorbic acid (Vitamin C) at a concentration of 100 to 200 ppm (parts per million) for up to 1 hour. This practice, inspired by in vitro micropropagation, combats oxidative stress and maintains cell viability.
- For 100 ppm: Dissolve a 500 mg tablet in 1.32 gallons (5 liters) of room temperature clean water.
- For 200 ppm: Dissolve a 1 gram tablet in 1.32 gallons of water.
For those far from the planting site, wrapping the base in a damp paper towel and plastic helps preserve freshness.
6. The “Double Cut” Method
This technique is little known outside professional nurseries, but it provides impressive results, particularly with woody or hard-to-root plants.
It consists of making two successive cuts at the base of the branch, strategically:
- First, cut the branch about 2 inches (5 cm) below the ideal point, keeping it intact and without applying any hormone.
- Then, place the cutting in clean water for approximately 12 hours.
- Only after this period, make the definitive cut at the exact point desired for the cutting and apply the rooting hormone.
This technique deceives the plant: the first cut already initiates the healing process and the mobilization of hormonal and enzymatic resources for defense and regeneration.
When performing the second cut, the tissue is physiologically better prepared to initiate rooting.
7. The Perfect Potting Mix

A common mistake is to use any generic potting mix for cuttings (or even soil!), but choosing the right medium can be the difference between success and the rotting of the branch. Test the use of ready-made potting mixes specific for rooting such as Carolina mix, for example. Additionally, you can use the layering technique:
The ideal potting mix for rooting is not homogeneous, but rather composed of specific layers, each with a well-defined function:
- Base: 0.8 inches (2 cm) of pure perlite to ensure excellent drainage and aeration.
- Central layer: your main mix (e.g., 50% plant potting mix + 50% perlite or vermiculite), providing support and slight water retention.
- Surface: 0.4 inches (1 cm) of vermiculite or coconut fiber, to keep the moisture stable and prevent crust formation.
Additionally, the potting mix should be sterilized before use, eliminating pathogens that compromise the base of the cutting:
- Solarization: leave the potting mix sealed in transparent plastic bags under the sun for 3 to 5 days.
- Oven: heat at 356°F (180°C) for 30 minutes in a household oven.
- Microwave: 2 to 3 minutes on high power for each slightly moistened liter of potting mix.
8. Maintain High and Constant Humidity
While many focus solely on watering the potting mix, professionals know that air humidity is equally vital to prevent branch dehydration before root formation.
The solution is to create a homemade mini greenhouse:
- Use cut PET bottles, clear plastic bags, or inverted plastic boxes to cover the pot.
- Spray water on the inner walls of the cover (never directly on the leaves) 1 to 2 times per day.
- Opt for a fine mist sprayer, which avoids excess water buildup and simulates natural mist.
In commercial nurseries, automated misting systems that release steam for a few seconds every 15-30 minutes are used, keeping the environment saturated without wetting the substrate. You can simulate this system with timers and home misters, achieving similar success rates to professional nurseries. 
9. Avoid Flowers and Buds
It’s common to want to keep the beauty of the flowers during propagation, but this practice is counterproductive. Flowers and buds:
- Divert metabolic energy that should be used for root formation.
- Continue to transpire and consume water at a critical time of water balance.
- Easily rot in humid environments, promoting the emergence of fungi and bacteria.
It is ideal to completely remove all flowers, fruits, and floral buds before planting the branch. This ensures that all the plant’s energy and resources are concentrated on regenerating the base and developing the roots. Although it may seem like an aesthetic sacrifice, this is one of the simplest and most effective actions to ensure the success of your cuttings.

10. The Liquid Biofertilizer Trick
After the emergence of the first roots — typically between 3 and 4 weeks, depending on the species — it is possible to accelerate root development with a little-known but extremely effective practice: the application of natural and diluted liquid biofertilizers.
This type of gentle nutrition provides organic compounds, humic and fulvic acids, which promote root expansion without causing damage to the still fragile young roots.
How to apply:
- Wait until you see clear signs of rooting (such as new leaves or resistance to touch).
- Dilute the biofertilizer in a ratio of 1 part to 20 parts water (e.g., 50 ml to 1 liter (0.13 gallons) of water).
- Gently water the cuttings with this solution once a week.
You can produce the biofertilizer at home using organic waste that would otherwise be discarded:
- Banana peels
- Coffee grounds
- Crushed eggshells
Place the ingredients in a container with water and allow to ferment for about 10 to 15 days in a shaded area, with the lid slightly open. Strain before use. Optionally, you can obtain biofertilizer from aged manure or from wormery leachate.
11. Deeply Understand the Species
This may be the most underestimated secret of all: knowing the plant you are trying to propagate. Each species has its own preferences regarding the time, type of branch, and rooting conditions.
The “ideal window” for cuttings varies significantly among plant groups:
- Conifers: best rooting at the end of winter
- Softwood shrubs: early spring
- Perennial flowering plants: early summer
- Woody trees: autumn, during the onset of dormancy
Moreover, the size and type of branch also drastically influence success:
- Herbaceous or tropical species generally root better with young branches.
- Woody shrubs and trees demand semi-hardwood or mature branches for greater efficiency.
Always research the physiology and behavior of the species. Knowing the vegetative cycle, sensitivity to pruning, and regeneration speed helps in choosing the ideal moment for cuttings and the most suitable technique.
12. Basal Heat: The Hidden Source of Success
Many gardeners only worry about the ambient temperature, but professionals know that the real secret lies in the temperature at the base of the cutting.
Basal heat stimulates metabolic activity, activates enzymes involved in cell division, and accelerates the formation of root primordia. This technique is particularly essential for woody species, tropical or those with a low rooting rate.
How to apply basal heat:
- Use horticultural heating mats with adjustable thermostats.
- Keep the temperature at the base of the cuttings between 72 to 79°F (22 to 26°C).
- Avoid heating the environment as a whole — localized heat is ideal.
This temperature difference between the base (warmer) and the top (cooler) also prevents early sprouting and focuses the plant’s energy on root formation.
13. Avoid Excessive Transpiration
One of the main causes of cutting failure is water loss through transpiration, especially before root formation. This happens because the branch, losing water through the leaves, cannot replace this fluid until new roots are formed.
The solution? Reduce the transpiration surface in a controlled manner:
- Completely remove the lower leaves.
- Leave at most 2 to 3 leaves on the upper part.
- Cut these leaves in half (horizontally) or remove up to 2/3 of the original size.
With this, the moisture of the branch is preserved, minimizing dehydration and allowing energy to be concentrated on regeneration and root formation.
This simple leaf pruning technique, when applied correctly, significantly increases the survival rate of cuttings, especially in environments with relative humidity less than 70%.
14. The Single Leaf Technique
Plants with large leaves present a particular challenge during rooting: they transpire too much. This excess water loss can cause the cutting to wilt or even die before the roots start to form.
To overcome this problem, professionals use a refined approach: the Single Leaf Technique. Here’s how to apply it correctly:
- Remove all leaves from the branch, except for one – choose the youngest fully developed leaf, usually more efficient in photosynthesis and less demanding in water.
- Cut this leaf in half, horizontally.
This significantly reduces the transpiration surface without completely eliminating the photosynthesis necessary for the survival of the cutting. This delicate balance between energy production and water conservation is essential for success in rooting branches of species such as Ficus, Philodendron, and Monstera, among other broad-leaved tropical plants.
Moreover, reduced leaves take up less space in mini-greenhouses and decrease the risk of contact with damp walls, which can promote the growth of fungi.

15. Acclimatization after Rooting
After successfully rooting a cutting, a common fatal mistake is to place it directly in the final environment without a transition period. This results in physiological shock, loss of leaves, or even death of the sapling.
A gradual acclimatization is an essential step, often neglected by amateur gardeners. The secret is to gradually adapt the sapling to the new conditions, minimizing stress. Here’s how to proceed:
- Rooted cuttings in water: add a spoonful of potting mix (substrato) to the water daily for 5 to 7 days. This process slowly adapts the aquatic roots to the solid and microbial medium of the potting mix.
- Rooted cuttings in a greenhouse: begin to gradually open the environment. Increase the ventilation daily for 10 to 15 minutes, then extend this time over 7 to 10 days. At the same time, gradually expose the plant to more light, initially in an indirect manner.
This transition process is known as “hardening” and is practiced in professional nurseries to reduce losses after transplanting. Without it, the still fragile sapling may collapse when facing temperature variations, wind, sun, or humidity.
Remember: a rooted branch is not yet an established plant. The true success of cutting only confirms when the plant adapts to the new environment and resumes vigorous growth.
16. The “Microbial Inoculation” Technique
A well-kept secret of professional nursery growers:
- Obtain fresh soil from the base of a healthy adult plant of the same species
- Dilute a spoonful of this soil in about a quart (1 liter) of water
- Filter the solution through a fine cloth
- Lightly water the cuttings with this solution once a week (do not apply in the first week)
This method transfers beneficial microorganisms (especially mycorrhizal fungi and growth-promoting bacteria) specific to that species. These microorganisms establish symbiotic relationships with the emerging roots, significantly increasing the success rate and vigor of the seedlings. For native plants, legumes, and forest species, this method can triple the success of rooting.
17. Using Rooting Hormones with Professional Precision
Applying rooting hormones may seem like a simple step, but their proper use can be a game changer between success and failure in root formation. The most commonly used substance is Indolebutyric Acid (IBA), a highly effective synthetic auxin in inducing adventitious roots. However, simply dipping the cutting in the powder is not enough—there are techniques that significantly maximize its effects.
Professionals prefer the use of hormones in liquid solution, especially for woody plants and those difficult to propagate. In this case, the tip of the cutting is immersed for 2 to 12 hours in a solution with an adjusted concentration of IBA, allowing for deep and continuous absorption. This technique has been associated with significantly higher rooting rates compared to the quick application of powder hormone.
Furthermore, the concentration should be adjusted depending on the type of cutting:
- Herbaceous cuttings: 100 to 1000 ppm
- Semi-woody cuttings: 1000 to 2000 ppm
- Woody cuttings: 2000 to 3000 ppm (or more, depending on the species)
Important: overdoses cause tissue necrosis at the base of the cutting, preventing root formation. Always follow the specific recommendation for the species in question and conduct small-scale tests before applying in large quantities.

Another important detail is the condition of the base of the cutting. Removing part of the bark (partial peeling or injury) before applying the hormone increases the contact area and further stimulates root formation. In summary, the hormone is more than just a ‘boost’ it’s a biochemical signal that triggers the entire cell differentiation process. When used precisely, it transforms any cutting into a new plant with much greater efficiency.
Not every cutting develops roots But every Gardener can try
Despite all the secrets revealed in this guide, it is important to remember that not all plant species can be propagated by cutting. Some simply do not easily form adventitious roots, even under the best conditions or using the most advanced techniques. This does not mean that these plants cannot be propagated just that they require methods more suited to their biological profile.
This is where the wisdom of the experienced gardener comes in: recognizing the natural limits of each species and applying alternative strategies. When a cutting doesn’t respond, often success is just one step away be it through air layering, serpentine layering, or even by dividing clumps. Some only propagate through seed! Each plant has its language and responds better to specific techniques.
Therefore, do not be discouraged if your cutting does not root on the first attempt. The apparent failure is part of the learning and experimentation that shape every good gardener. Test different types of cuttings, change the potting mix, adjust the moisture, vary the time of year, alternate the hormones, and try the professional techniques we share.
Gardening, after all, is both science and art. It is a fertile field of personal discoveries, where each attempt is a lesson and each successful seedling, a small victory. Now that you know the professional secrets of how to root any cutting, you are more prepared than ever to transform simple branches into new plants.
Hands in the dirt! Root your cuttings, record your discoveries, and allow yourself to experiment. Nature always rewards those who observe, test, and care diligently.
FAQ – Frequently Asked Questions
Q: How long does it take for a cutting to develop roots? A: It varies greatly depending on the species and conditions. Easy herbaceous plants like coleus can root in 7-10 days. Semi-woody plants like roses take 3-6 weeks. Difficult species like olive trees and magnolias can take 2-4 months.
Q: Can I use powdered cinnamon as a substitute for rooting hormone? A: Cinnamon has antifungal properties that can help prevent rotting, but it does not completely replace rooting hormones. For easy-to-root cuttings, cinnamon may be sufficient. For moderate to difficult species, combine cinnamon with commercial hormones for better results.
Q: Why do my cuttings stay green and healthy for weeks but fail to develop roots? A: This usually happens because the cutting is using stored reserves to stay alive, but lacks conditions to initiate rooting. The most common causes are: inadequate temperature (especially lack of basal heat), absence or insufficient concentration of hormone, or collection at an inappropriate time of year for that species.
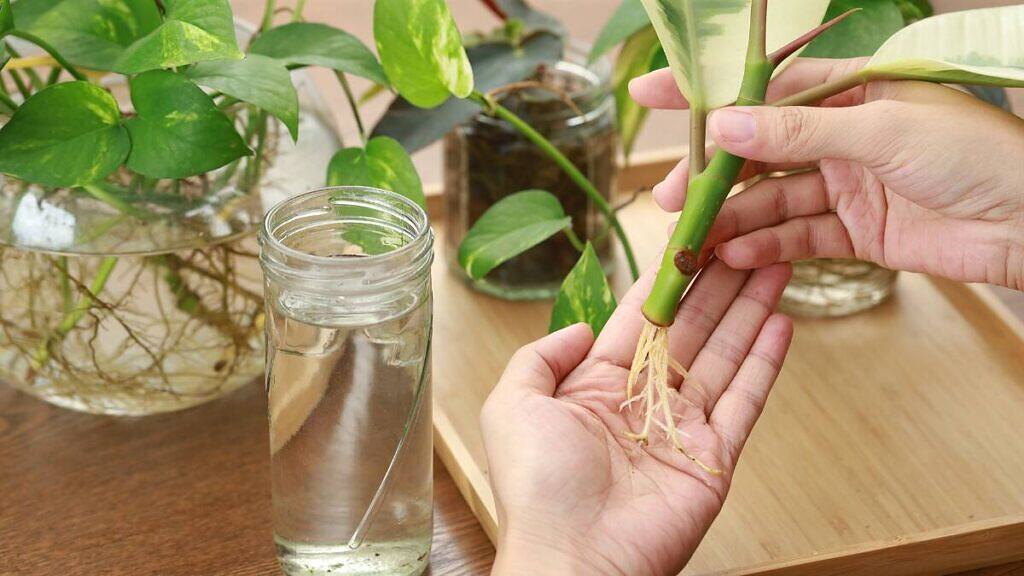
Q: Is it better to root in water or in a potting mix? A: It depends on the species. Plants with soft tissues and a high predisposition to rooting (like pothos and spiderwort) perform well in water, and it is rewarding to see the roots. Woody plants and moderate to difficult species usually have much more success in a well-drained potting mix. Roots formed in potting mix are generally more robust and adapt better to transplanting.
Q: Should I remove all flowers and flower buds from the cutting? A: Yes, always. Flowers and buds consume energy that should be directed towards root formation. They can also rot in the high humidity required for rooting, causing fungal problems.
Q: How many leaves should I leave on the cutting? A: Balance is crucial. Leaves are necessary for photosynthesis, but they also increase water loss. For most species, leave 2-4 leaves (or pairs of leaves) at the top, removing all others. For large leaves, cut them in half horizontally to reduce transpiration.
Q: How can I tell if my cutting has formed roots without removing it and checking? A: Signs of successful rooting include: gentle resistance when the cutting is slightly pulled, growth of new leaves at the top, maintenance of turgidity even with less frequent misting, visible roots emerging from drainage holes, or visible through transparent containers.
Q: What are rooting hormones and are they really necessary? A: Rooting hormones contain auxins, mainly IBA (indole butyric acid) and/or NAA (naphthalene acetic acid), which stimulate root formation. They are not strictly necessary for easy plants (such as basil or mint), but significantly increase the success rate and rooting speed for moderate to difficult species. For truly challenging plants, they are practically indispensable.
Q: Why do some cuttings rot even in apparently dry substrate? A: The base of the cutting may decay even without apparent waterlogging. This occurs when the substrate is not well aerated or when pathogenic fungi are present in the environment. Cuttings easily rot in organic substrates that are not sterilized or poorly drained. Pre-sterilization of the substrate, choosing materials like perlite or coarse sand, and the use of natural fungicides (like horsetail tea or cinnamon solution) help prevent the problem.
Q: Can I use natural rooting agents such as aloe or willow water? A: Yes, both Aloe vera and willow branch extract contain substances with actions similar to auxins, as well as antioxidant and antimicrobial compounds. Although they do not replace the potency of synthetic hormones in difficult cuttings, they are excellent options for beginners, especially with herbaceous or tropical plants that root easily. Willow water, rich in salicylic acid and indoleacetic acid, should be used fresh and soaked for a few hours before planting.
Q: What is the difference between rooting in water and in substrate? Which is better? A: Rooting in water is more visually satisfying and suitable for soft tissue species, such as Pothos, Spiderwort, or Impatiens. However, roots formed in water are morphologically different, less branched, and more fragile during transplanting. Cuttings rooted directly in substrate form more robust roots adapted to the terrestrial environment. For woody or semi-woody species, substrate is almost always the better choice.
Q: Should I remove the new leaves that appear during rooting? A: Not necessarily. The emergence of leaves indicates that the cutting is metabolically active. However, very young leaves still do not perform photosynthesis efficiently and can increase transpiration. If the environment is humid and well controlled, keep the new leaves. In conditions of low humidity or poor ventilation, it may be beneficial to remove or reduce emerging leaves to prevent dehydration of the cutting.
Q: How long should I wait before considering that the cutting will no longer root? A: The time varies greatly depending on the species, type of cutting, and environmental conditions. Generally, herbaceous cuttings should show roots within up to 3 weeks. Semi-woody cuttings can take from 4 to 6 weeks. Woody cuttings require patience: some may take from 2 to 4 months or more. If after this period there are no signs of rooting (new leaves or resistance to touch), and the base is darkened or the tissue is wilted, it is time to try again with a new technique or a different cutting.