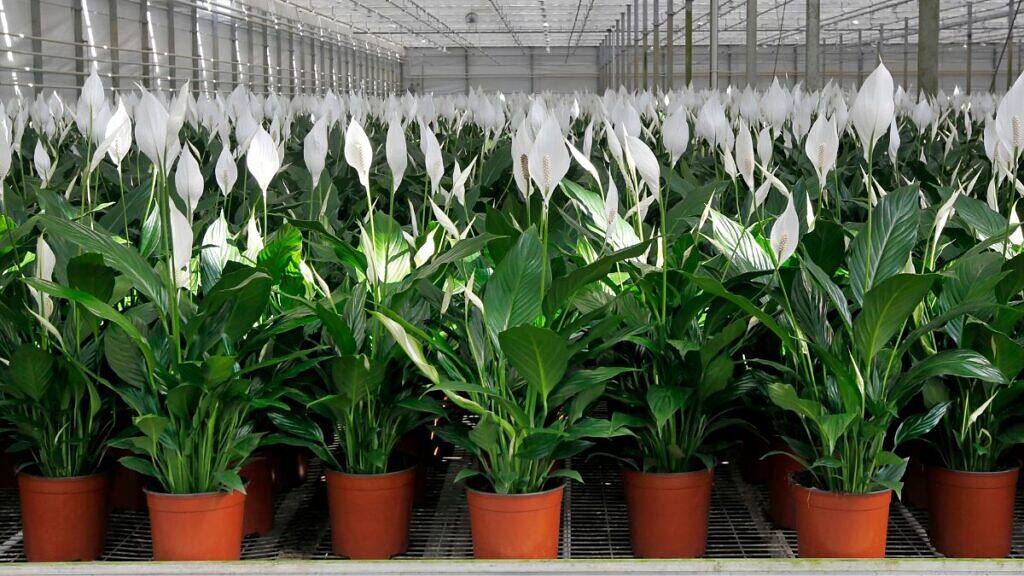
Have you noticed how the peace lily manages to look utterly unfazed even when the house is a complete mess—and still delivers that clean, elegant feel to the space?It’s no coincidence that the peace lily (Spathiphyllum) has become an indoor classic. The peace lily combines three traits that rarely show up together: it tolerates indoor environments very well, it gives clear signs when something is off (especially thirst and too much sun), and it maintains a sophisticated look, with glossy green foliage and pale spathes that many people interpret as a symbol of serenity. And here comes the cultural side that really matters: in many homes and workspaces, the peace lily is chosen precisely because of this symbolism of “peace,” balance, and warmth—almost like a botanical reminder that you can take a deep breath and carry on. It’s a plant that communicates calm without needing any explanation.But behind this reputation as an “easy plant,” there’s an important detail: it is not “resistant to everything.” It is consistent with its own ecology. When we treat the peace lily as a tropical understory plant (and not as a generic decorative object), care becomes predictable, and blooming stops being a matter of luck.Botanically, we’re talking about a perennial, rhizomatous herb that grows in clumps: the leaves emerge directly from the rhizome, without forming a noticeable woody stem. And what we commonly call the “flower” is actually an inflorescence: a spadix (the central spike with tiny flowers) surrounded by a spathe—usually white, sometimes turning greenish with age. This structure is typical of aroids and helps explain why the peace lily can be so ornamental even in filtered light.So the safest way to understand how to grow peace lily with healthy, consistent flowering is simple (and far less mystical than it sounds): look at where it comes from and imitate the rules of that place. Native to humid tropical forests of the Americas, the peace lily is used to bright indirect light filtered through tree canopies, soil rich in organic matter, good aeration, and relatively stable humidity—in the air and in the potting mix, without waterlogging. That is exactly what we’re going to translate, step by step, to indoor containers and to shaded garden beds outdoors.
Most common peace lily types and how to choose (or identify) yours
Before talking about care, it really helps to understand that there isn’t just one single peace lily. There are species and, above all, cultivars and commercial selections with very different sizes and uses.
Common peace lily (Spathiphyllum wallisii and hybrids)
This is the type of peace lily most easily found in supermarkets, flower shops, and garden centers. The common peace lily has a small to medium size, generally between 16 and 24 in (40 and 60 cm) in height, with dark green, lance-shaped leaves and abundant production of white spathes throughout the year when properly maintained.It works very well:
- in medium pots indoors or in offices
- in group plantings in shaded beds
- as a focal peace lily in lobbies and entrances sheltered from direct sun
Spathiphyllum ‘Mauna Loa’: an indoor classic
‘Mauna Loa’ is a medium to large cultivar of peace lily that can reach close to 36 in (90 cm) or a bit more, with larger leaves and broad, very showy spathes. It is widely used in spacious interiors, reception areas, wide corridors, and also in mass plantings in shaded outdoor areas, as long as it is protected from direct sun and severe cold.I recommend this type of peace lily when:
- you want a more “sculptural” plant in a single pot
- the room is larger, with generous circulation space
- the bed is shaded and needs only a few clumps, but with strong impact
Mini peace lily: ‘Petite’ and other compact types

- coffee tables or side tables
- offices and workstations
- shelves with bright indirect light
- mixed container plantings with other shade-loving plants
Because they are small, they usually need watering a bit more often (the volume of potting mix is smaller), and their roots quickly fill the pot.
Variegated peace lily: ‘Domino’ and similar types
 The so-called variegated peace lily, such as the cultivar Spathiphyllum ‘Domino’, has leaves marked with white or cream streaks or splashes over green. Visually, this peace lily is very striking and contemporary.Key points of this type:
- it needs a bit more bright indirect light than the green varieties to maintain the variegation
- it does not tolerate direct sun either – it burns easily
- it works very well as a focal plant in bright indoor spaces
Besides ‘Domino’, you can also find other variegated peace lily options on the market, such as ‘Picasso’ and ‘Diamond’. These are the ones that usually show up in collections and more niche retailers. The logic is the same: they need more bright indirect light to preserve their variegation and they are more sensitive to stress (prolonged dryness and direct sun).
Spathiphyllum ‘Sensation’: the floor peace lily

- you want a floor plant for a large pot, with a strong leafy mass effect
- the space is generous (large living rooms, lobbies, wide hallways) and can accommodate the volume
- you prefer an impact plant even outside the blooming season
Spathiphyllum ‘Sweet Lauretta’: broad leaves and a more sculptural texture
‘Sweet Lauretta’ also falls into the group of large peace lilies, but with a distinctive finish: the leaves tend to be broader, with a more pronounced texture (slightly wavy/corrugated), which gives a more sophisticated look even without many spathes open. It is an excellent choice for elegant interiors and for deeply shaded outdoor areas, as long as they are protected from severe cold.I would suggest this peace lily type when:
- you want a large peace lily, but with a less common appearance
- the design calls for leaf texture and presence, not just flowering
- the location has bright shade and good protection from wind and low temperatures
‘Cupido’ peace lily line: compact, full, and very floriferous
The ‘Cupido’ line (with different commercial selections) usually brings together compact, dense peace lily cultivars, with proportionate leaves and abundant spathe production even on relatively small plants.It’s a very interesting option for anyone who wants the classic peace lily look, but in a more controlled format that is easier to fit into interiors, without turning into a huge clump over time.They are excellent for:
- medium-sized pots in living rooms, bedrooms, and offices
- group compositions (two or three pots together) without visually weighing down the space
- those who like to see more peace lily spathes throughout the year, with proper care
- spaces with bright indirect light, but no direct sun
Because they are more compact and have an efficient root system, they usually do well in medium-sized containers for quite a while, but they perform better when you repot them periodically and renew part of the potting mix to maintain aeration and fertility.
Giant peace lily (Spathiphyllum cannifolium): “tropical foliage” effect

- you want volume and presence, as a floor plant in a large pot
- the space has enough ceiling height and circulation to accommodate a wider clump
- the goal is to create a lush green backdrop in bright shade, without relying so much on flowering
Because it has larger leaves and higher transpiration, it tends to suffer more when the potting mix dries out too much. This giant peace lily also responds well to environments with more stable air humidity and evenly spaced watering, always without waterlogging. In addition to Spathiphyllum cannifolium, other species that may appear as “giant peace lily” in catalogs and on labels are Spathiphyllum cochlearispathum and, less frequently, Spathiphyllum kochii.There are also other larger and smaller selections of peace lily on the market, but without detailed, standardized technical information, the safest approach is to guide your care based on size (large leaves vs. small leaves) and on the general characteristics of the genus Spathiphyllum.
Understanding the physiology: why peace lily wilts, “cries” water and stops blooming
Knowing a bit about peace lily physiology helps you interpret the signals the plant gives in everyday care.
Wilting as a sign of thirst (and also of excess!)
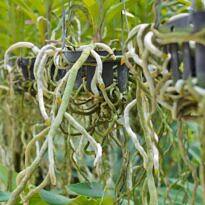
The peace lily has relatively large, thin leaves, with a broad transpiration area. When the potting mix dries out beyond what is ideal, the plant reduces its internal water pressure and the leaves visibly wilt, often “collapsing” to the sides.This wilting:
- is a warning of water deficit in the roots
- usually reverses well if you water promptly
- can, if repeated frequently, lead to burned tips and dry leaves
Curiously, a plant in waterlogged potting mix can also wilt, because roots without oxygen begin to rot and lose their absorption capacity. The difference lies in the recent history: if you have watered too much in the last few days and the pot feels heavy, suspect excess water.
Guttation: the “tears” on the leaf tips
It is common to see droplets at the leaf tips at night or early in the morning. This is guttation: when the plant absorbs more water through the roots than it can transpire, it expels the excess through structures called hydathodes.It is not a disease, not a pest, and not “poison sweat.” But it may indicate:
- potting mix that is constantly too moist
- high relative humidity
- mild nighttime temperatures with heavy watering
If guttation is very frequent, it is worth reviewing your watering practices.
Why doesn’t the peace lily bloom?
Several factors can block blooming:
- insufficient light: this is the main reason; in deep shade, the peace lily invests only in foliage
- excess nitrogen: too much leaf fertilizer, not enough for flowers
- a pot that is too tight or an old, overcrowded clump with no renewal
- very low temperatures, below 59 °F (15 °C) for prolonged periods
Indoors, the problem is almost always light: the farther from windows and skylights, the lower the likelihood of abundant peace lily flowering.
How to grow peace lily in pots indoors
Growing in pots is the most common use of this plant, so it is worth detailing the critical points: light, water, potting mix, and fertilization.
Ideal light for peace lily in indoor spaces
Think about the light that reaches the interior of a tropical forest: bright, yet filtered. That is what you want to replicate with your peace lily.Good situations for bright indirect light:
- near windows with sheer curtains
- beside east- or west-facing windows, with no direct sun on the leaves
- on bright balconies, under a roof or slab, without midday sun
Signs of insufficient light:
- very dark, elongated leaves stretching toward the light
- growth that is far too slow
- lack of flowering, even with proper fertilization
Signs of too much light (including direct sun):
- yellowish or brown spots on the leaves, especially on the most exposed areas
- leaf edges drying out even with appropriate watering
I usually recommend the “book test”: if you can comfortably read a book near the peace lily without needing artificial light during the day, the light level tends to be sufficient for a peace lily to bloom.
Potting mix, container and drainage: where the peace lily really lives
The roots of Spathiphyllum prefer:
- a potting mix rich in organic matter
- a loose texture with good aeration
- a slightly acidic pH (around 5.8–6.5)
Creating a good potting mix with common materials:
- 1 part topsoil or well-sifted garden soil
- 1 part well-aged compost or earthworm castings
- 1 part material that improves aeration, such as small pine bark, coconut coir, carbonized rice husk, or coarse washed sand
About the container:
- it must have unobstructed drainage holes
- it can be plastic, ceramic, or concrete; what matters is adjusting watering frequency (unglazed clay pots dry out faster)
- the size should match the clump: neither tiny nor excessively large
Avoid keeping a saucer permanently “full of water.”The ideal method is:
- water until it runs out through the drainage holes
- wait a few minutes
- discard any excess that has collected in the saucer

Watering peace lily in pots: how to keep it moist without waterlogging
Who hasn’t killed a peace lily out of excessive zeal with the watering can?Practical rules:
- insert your finger into the potting mix up to the first knuckle; if it feels moist, do not water
- if it feels only slightly moist on the surface, but drier underneath, you can water
- in hot, dry climates, watering frequency will be higher; in cool, humid locations, it will be lower
Signs of underwatering:
- overall wilting of the leaves
- smaller new leaves
- dry tips on several leaves
Signs of excess water:
- wilting even though the potting mix is wet
- a sour, unpleasant soil smell
- general yellowing, starting with the oldest leaves
Fertilizing peace lily to keep foliage lush and blooms regular
Because it is a plant that prefers rich soil, peace lily responds very well to regular fertilizing.Possible strategies:
- every 2–3 months, lightly work a bit of earthworm castings or organic compost into the surface
- during periods of active growth and flowering, use a balanced, all-purpose mineral fertilizer, always at the dosage recommended by the manufacturer
Points of attention:
- avoid excess nitrogen, which stimulates too much foliage and too few flowers
- never fertilize when the potting mix is dry; lightly water first
- for weakened plants, start with lower doses
Repotting and dividing peace lily clumps in containers
Because peace lily grows in dense clumps, over time the pot becomes packed with roots. This is great for flowering up to a point, but eventually the space runs out.Signs that it’s time to repot your peace lily:
- roots growing out through the drainage holes of the pot
- potting mix drying out too quickly after watering
- clump excessively compact, with little space between plants
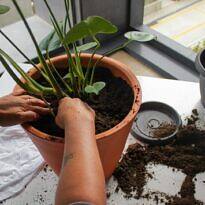
Step-by-step guide to repot and divide your peace lily:
- water the plant one day beforehand to make handling easier
- carefully remove the root ball from the pot, gently squeezing the sides
- observe the rhizome “segments”: each one with a few leaves and its own roots can become a new division
- separate the desired portions by hand; use a clean knife only if necessary
- plant each division in a new pot, with fresh, well-draining potting mix
- keep in a spot with bright indirect light and moderate watering until the peace lily is established
After division, it’s normal for peace lilies to look a bit droopy for a few days, but if the potting mix and light are correct, they soon regain vigor.
How to grow peace lily in garden beds
It’s not just a living-room plant: peace lily also performs very well in gardens, as long as you respect a few limits.
Light outdoors: partial shade is the key
Outdoors, peace lily tolerates brighter conditions, but it does not like strong direct sun, especially at midday.Good locations for planting peace lily in beds:
- under trees with light to medium canopy
- next to east-facing walls, with gentle morning sun and shade for the rest of the day
- under porches, awnings, and overhangs with abundant but filtered light
In regions with cold winters, it is important to protect the peace lily from frost and from temperatures persistently below 55–59 °F (13–15 °C). In areas subject to more intense cold, keeping the peace lily in movable containers can be safer.
Soil preparation in the garden
The principle is the same as in pots: rich, loose, well-drained soil for your peace lily.For garden beds:
- loosen the soil to a depth of at least 10–12 in (25–30 cm)
- mix in well-aged organic matter (compost, thoroughly decomposed manure, humus) at a ratio of 1 part organic material to 2 parts soil
- if the soil is very clayey and heavy, incorporate coarse sand and/or pine bark to improve drainage
If the area tends to collect rainwater, consider raising the garden bed above ground level, creating a “raised bed” to prevent waterlogging.
Group planting and landscape maintenance
The most attractive effect with peace lily usually comes from mass or row plantings, rather than isolated plants scattered across large areas.Design tips:
- plant in groups of 3, 5 or more clumps, depending on the plant size
- respect spacing: 12–20 in (30–50 cm) between plants, according to the size of the cultivar
- combine with other shade-loving species, such as ferns and some prayer plants, always checking compatibility in terms of care and growing conditions
For maintenance:
- keep the bed covered with a layer of mulch (dry leaves, pine bark) to retain moisture and reduce volunteer weeds
- apply light organic fertilization 2–3 times a year
- rejuvenate older clumps of peace lily by division every few years, if necessary

Signs of problems in peace lily care and how to fix them
The peace lily is quite expressive. Some of the most common problems can be read directly on the leaves.
Yellowing leaves
Possible causes:
- nutrient deficiency – more generalized, slow yellowing
- overwatering – yellowing associated with wilting and constantly waterlogged potting mix
- age – very old leaves turn yellow and die; this is natural
Actions to take:
- check how often you water and whether drainage is adequate
- evaluate how long it has been since the last feeding; if it has been a while, apply a light dose of fertilizer
- remove very old or heavily damaged leaves, cutting them at soil level
Dry, scorched tips
These can indicate:
- very dry air (common in spaces with strong air conditioning)
- irregular watering, with some periods of drought
- salt buildup from excessive fertilizer
What to do:
- raise humidity around the peace lily (grouping plants, using pebble trays with water, without letting the pot sit directly in the water)
- adjust watering, avoiding extremes between completely dry and waterlogged
- in cases of heavy fertilization, flush the potting mix thoroughly with water, letting it drain well through the holes
Pests and related issues
Without exaggeration, the peace lily is not among the most pest-prone plants, but it can be attacked by:
- mealybugs
- aphids
- spider mites, especially in very dry conditions
Regular inspection of the leaves (especially the undersides) and a balanced approach to humidity and air circulation greatly help with prevention. Whenever possible, choose gentler control methods that are compatible with indoor use.
Toxicity: beautiful plant, but not a toy
All parts of the peace lily contain calcium oxalate crystals, a substance known to cause oral irritation and discomfort if ingested. This type of compound is well documented in scientific sources and can be found, for instance, in general explanations about calcium oxalate in toxic plants for pets.In practice:
- if a pet chews leaves or flowers, it may show intense drooling, discomfort in the mouth, and difficulty swallowing
- in small children, chewing parts of the peace lily tends to cause a burning sensation in the mouth and on the tongue
- cases are usually self-limiting, but they require attention and, if necessary, medical or veterinary evaluation, especially if there is significant swelling
Basic precautions:
- place pots out of reach of very young children and pets that are in the habit of nibbling on plants
- avoid using peace lily in planting beds in areas where dogs and cats roam freely and often dig or chew on vegetation
- after handling the peace lily (pruning, dividing clumps), wash your hands before touching mucous membranes

Conclusion: the peace lily does not need a “magic touch”, it needs consistency
The peace lily often becomes a domestic drama for a simple reason: we try to care for it on “autopilot”, as if it were a cactus or a fern. Once you understand that it is an understory plant (filtered light, stable humidity, and potting mix that is always very well aerated), growing peace lily stops being a lottery and becomes a routine.From there, use the plant as a gauge: if the leaf loses its shine, if the tip turns dry, or if it wilts frequently, it is not bad luck — it is a matter of fine-tuning light, watering, and potting mix. Make small changes, wait for the response, and move on. This cycle of observing and adjusting is exactly what separates a “struggling” peace lily from a peace lily that looks like a magazine-cover plant.You already have the map. Now you just have to drive: with a bit of consistency (and without waterlogging), your peace lily tends to look better month after month — and you will gain confidence because you will understand the reason behind each decision, rather than just repeating random rules.