Have you ever thought about using coffee grounds in a plant pot and wondered if it really works? You might have heard that it acidifies the soil, repels pests, fertilizes any plant, and even makes everything greener. Well, I’ll be straightforward with you: like almost everything in gardening, the answer is “it depends”.
Coffee grounds can indeed be useful. However, they are not a miracle fertilizer, they do not replace balanced fertilization, and, if used incorrectly, they can cause more headaches than benefits. In pots, the damage becomes apparent quickly: compacted potting mix, water that doesn’t drain, fungus on the surface, and seeds that refuse to sprout.
Let’s agree on something before we continue: the best use for coffee grounds, most of the time, is in the compost bin. There, it enters as an organic waste rich in nitrogen, mixes with dry leaves and other carbon-rich materials, and turns into stable compost. This, indeed, is safe and beneficial for plants.
In this article, I will show you what coffee grounds really offer, how to use them safely, when it is better not to use them, and the most common mistakes that turn good intentions into losses in the garden.
What are the benefits of coffee grounds for plants?
Coffee grounds are the solid residue left after brewing your coffee. They contain organic matter, a little bit of nutrients, and compounds that soil microorganisms utilize during decomposition.
On average, used coffee grounds contain about 1% to 2% nitrogen, plus a trace of potassium, phosphorus, calcium, magnesium, and micronutrients. This might seem good at first glance, but there’s an important detail: these nutrients are not immediately available to the roots, as is the case with soluble fertilizers.
Before becoming plant food, the coffee grounds need to be decomposed. This job is done by bacteria, fungi, and the soil fauna. That’s why I prefer to view coffee grounds as an organic ingredient, part of the garden’s organic matter cycle, and not as a quick-response fertilizer.
The grounds help with soil structure and microbial life, and they make use of a kitchen waste that would otherwise be thrown away. But on their own, they do not nourish a plant.
It is a complement, never the base.
Does coffee grounds acidify the soil?
This is one of the most stubborn myths in home gardening. Many people believe that the grounds are highly acidic and would therefore be perfect for azaleas, hydrangeas, camellias, and blueberries. That’s not quite right.
The strong acidity is in the beverage, not in the grounds. Once the water passes through the coffee, much of the soluble compounds go along with the coffee you drink. What remains in the filter usually has a pH close to neutral, or at most slightly acidic.
In other words: coffee grounds do not serve as a strategy to acidify the soil. If a plant really needs acidic soil, the way to go is to measure the pH and adjust it with the appropriate material, technically and gradually.
Coffee grounds are not pH adjusters. And fortunately, because if every morning coffee drastically changed the soil’s acidity, home gardening would be a chaotic laboratory smelling of espresso.

The best use of coffee grounds: the compost bin
If you want to use coffee grounds in a safe, efficient, and environmentally smart way, send them to the compost bin. It’s the use I recommend wholeheartedly.
In the compost bin, the grounds act as a material rich in nitrogen, just like fruit peels, vegetable scraps, and fresh grass clippings. For decomposition to occur smoothly, it needs company: material rich in carbon, such as dry leaves, untreated sawdust, shredded cardboard, straw, and finely crushed branches.
This mix makes all the difference. Microorganisms need a balance of nitrogen, carbon, air, and moisture. Using too much coffee grounds with insufficient dry material can compact, saturate, and create a smelly and slow composting process.
How to Use Coffee Grounds in a Composter
- Gradually add the grounds. Instead of dumping the entire week’s coffee pot at once, add small portions more frequently.
- Always pair with dry material. For each portion of grounds, add dry leaves, shredded cardboard, straw, wood shavings, or sawdust.
- Avoid thick layers. Coffee grounds are fine and compact easily. Spread them out and mix well.
- Keep it moist, not drenched. The ideal consistency is like a wrung-out sponge: damp but not dripping.
- Stir and aerate. This helps control odors and promotes aerobic decomposition, which produces quality compost.
A practical tip I use: keep the coffee grounds to no more than about 20% of the compost pile’s volume. Beyond that, the balance is disrupted, and the material still decomposing can even hinder plant growth.
Do You Need to Dry Coffee Grounds Before Using Them?
It depends on the purpose.
If they are going directly into the composter, drying is not necessary. Add them moist but mixed with dry material. Moisture is part of the process there.
However, if the plan is to store them for a few days or use them in small amounts in potting mix, drying makes a difference. Moist grounds in a closed container mold quickly, ferment, clump together, and produce an undesirable odor near the sink.
To dry, spread the grounds in a thin layer on a tray, plate, or sheet of paper in a ventilated area. Once they are loose and free of moist clumps, store them in a paper bag or open container in a dry environment. A closed container with still-moist grounds is a recipe for mold.
If there is a superficial white mold, don’t panic. Generally, it’s a decomposing fungus, a normal part of the cycle. However, for safety, avoid stirring it, do not inhale the spores, and send the grounds to the composter. Inside the house, in a pot, there’s no room for it anymore.

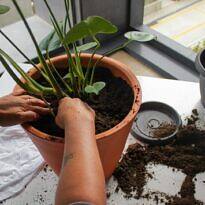
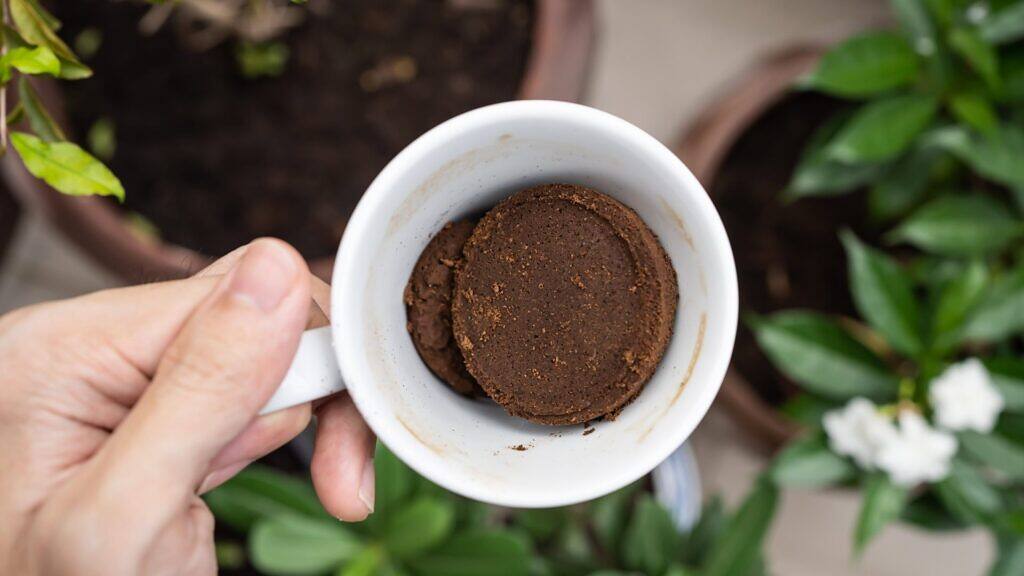
Can I put coffee grounds directly in the pot?
You can, but it is not the best way to use them. The pot has a limited potting mix volume, and drainage highly depends on the texture (or granulometry if you prefer the technical term), and any mistake is quickly noticeable. A thin layer of grounds on top of dry soil hardens and forms a crust that repels watering water.
This is one of the most common mistakes I see during consultation: the reader spreads pure grounds over the pot, thinking they are mulching. Result: potting mix appears moist on the surface, dry inside. Or the opposite, waterlogged pot, no air, with roots suffering underneath.
Even so, if you still want to use coffee grounds in a potted plant’s substrate, proceed with caution. The safest recommendation is to limit the dry grounds to a maximum of 5% of the volume of the mix, very well incorporated, never in a pure layer.
How to calculate 5% of coffee grounds in the substrate
- For 1 liter (34 fl oz) of substrate: no more than 50 ml (1.7 fl oz) of dry coffee grounds.
- For 5 liters (1.3 gallons) of substrate: no more than 250 ml (8.5 fl oz) of dry coffee grounds.
- For 10 liters (2.6 gallons) of substrate: no more than 500 ml (17 fl oz) of dry coffee grounds.
Even at this ratio, mix very well. If you still see brown spots or clumps of pure coffee grounds, it is not incorporated enough yet.
For a plant sensitive to moisture excess, which needs airy roots — cactus, succulent, desert rose, orchid, anthurium, lavender, rosemary, and the Mediterranean crew —, it is better to skip this step altogether.
Coffee grounds are not for them.

Coffee grounds in the preparation of garden beds and planting holes
When preparing a new garden bed or digging a hole for a tree, shrub, rosebush, or fruit seedling, coffee grounds can be used as an enhancement of organic matter, not as the main fertilizer. Here in the open garden, the soil has enough volume to absorb small doses, microbial life is more active than in pots, and the likelihood of the coffee grounds causing damage is much lower. Still, I prefer to incorporate already composted coffee grounds when available. Fresh coffee grounds also work, provided they are used sparingly and well mixed with soil, mature compost, and sand or another conditioner, depending on your soil’s texture.
For a tree or shrub, dig the hole to the dimensions required by the species, generally at least twice the volume of the root ball, and set aside the excavated soil. Mix this soil with mature compost, a bit of planting fertilizer (formulated for the plant’s size), and, if you want to utilize the coffee grounds, at most one American cup (about 7 fl oz) spread out and well incorporated for every 8-10 gallons (30-40 liters) of this mixture. Place the plant in the center, complete with the mixture around the root ball, carefully firm it up and water well. Never dump the coffee grounds at the bottom of the hole in a concentrated layer, and never let it touch the root collar, where the stem meets the roots. Accumulated grounds there suffocates, retains too much moisture, and opens the door to fungus.
In flower and vegetable beds, the logic is similar but more delicate because most of these plants have shallow roots and a short cycle. Before planting, till the top eight inches of soil, spread mature compost, aged manure (from cattle or poultry, depending on what you can get in your area), and if you want to add coffee grounds, keep the dose modest: a cup of dry grounds per square yard of bed, at most, well incorporated into the soil along with the rest. For leafy vegetables, such as lettuce, arugula, endive and spinach, I take extra care and prefer to use only the already composted coffee grounds. These plants quickly sense any imbalance in the root zone, and the short cycle does not allow fresh grounds to complete decomposition peacefully.
An important note for those setting up a bed for direct sowing, such as carrots, radishes, beetroots, or annual flowers sown in place: skip the fresh grounds in this stage. Wait for the bed to stabilize, sow in clean substrate, and if you want to use grounds, save it for maintenance, a few months later, when the plants are already grown and the soil life is well underway. During the installation phase, the rule is simple: well-prepared soil, matured compost, adjusted irrigation, and patience. Coffee grounds enter as a discreet seasoning, never as the main dish.
Old brewed coffee: how to utilize it in watering and leaf cleaning
In addition to the grounds, leftover brewed coffee in the pot can also be used carefully. It’s important to clarify: I’m talking about filtered, pure coffee, without sugar, without milk, without cream. Just old black coffee, period.
This diluted coffee can occasionally be used for watering well-established ornamental plants. The dilution is key: it makes the solution milder, prevents staining, strong odor, and excess soluble compounds in the substrate.
How to utilize old brewed coffee in watering
- Use only pure coffee, without sugar and milk.
- Dilute in water before applying.
- Safe ratio for home use: 1 part coffee to 5 to 10 parts water.
- Apply to the substrate. Do not shower the foliage in coffee.
- Use occasionally, as a complement. Do not turn it into a fertilization routine.
You can also use very diluted coffee for cleaning large, smooth, and sturdy leaves, like those of anthuriums, philodendrons, monstera, and some tropical foliage. It helps remove dust and restore natural shine, provided the approach is gentle.
Practical method: dilute a bit of old filtered coffee in water, moisten a soft cloth, and gently swipe over the leaf blade.
If desired, finish with another cloth using just water.
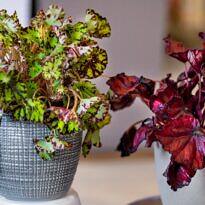
Avoid this method on velvet, hairy, very thin, light, overly waxy, or stain-prone leaves. Plants like African violet, Rex begonia, delicate calathea, and pruinose succulent should be excluded.
Before applying to the entire plant, test on a single leaf. If after a few days there is no staining, loss of shine, burns, or any odd reactions, occasional use is likely safe.

Do coffee grounds repel slugs, snails, and ants?
Research shows that a caffeine solution affects slugs and snails. However, this does not mean that spreading grounds in the garden is a reliable pest control method. Concentration, method of application, and pest sensitivity change everything.
In practice, the coffee grounds may bother some slugs for a while, but the effect is irregular. Rain, irrigation, and natural decomposition quickly dilute any possible repellent action.
For ants, the situation is even more inconsistent. Sometimes they avoid the area, sometimes they create a new trail beside it, and sometimes they completely ignore the human attempt to create boundaries with coffee powder. I’ve even seen anthills built on top of fresh grounds without any hesitation.
Conclusion: do not treat coffee grounds as an insecticide, molluscicide, or a pest control solution. They are, first and foremost, a beneficial organic residue.
When to Avoid Using Coffee Grounds
Even though it is natural, coffee grounds are not suitable for every situation.
- Avoid in seed starting. Caffeine residues and other allelopathic compounds hinder germination and early root development.
- Avoid in small pots. The risk of compacting the potting mix and disrupting the balance is greater.
- Avoid in cacti and succulents. These plants prefer a more mineral and well-drained substrate.
- Avoid in dry and alkaline soil plants. Lavender, rosemary, and other Mediterranean plants generally do not thrive with moist organic residue nearby.
- Avoid leaving exposed coffee grounds in a home with curious pets. The residual caffeine is toxic for dogs and cats if consumed in significant amounts. The health of your pet is more important than recycling coffee grounds.
- Avoid coffee grounds with sugar, milk, or sweetener. They attract insects, ferment, smell bad, and spoil the potting mix.
Common Mistakes When Using Coffee Grounds on Plants
1. Applying coffee grounds directly onto the soil of the pot
This is a classic mistake. The coffee grounds form a thin, compact, and nearly impermeable layer after drying. Instead of helping, it hinders watering and root respiration.
2. Storing wet coffee grounds in a sealed container
They mold quickly. If storing, dry them in the sun first. If you don’t want to dry them, send them directly to the compost bin and that’s it.
3. Using as the main fertilizer
Coffee grounds do not have all the nutrients a plant needs. They do not replace well-planned fertilization or correct a significant nutritional deficiency.
4. Using in seed starting
Seeds and seedlings are very sensitive.
Residue can hinder germination and initial growth. At this stage, use a light, clean substrate suitable for sowing. Do not compromise on this.
5. Thinking that every plant likes it
Not every plant appreciates decomposing organic matter near its roots. Epiphytes, plants from dry environments, and plants from poor mineral soils may react poorly.
6. Using sweetened or milk-added coffee
Sugar, milk, and similar additives do not belong in the pot. They attract insects, ferment, stain leaves, and produce bad odors. That coffee is meant for drinking only.

Frequently Asked Questions About Coffee Grounds in Plants
Are coffee grounds fertilizer?
They are an organic residue with some fertilizing value, not a complete fertilizer. The smartest use is in a compost bin, where it turns into stable compost.
Can I put pure coffee grounds in the pot?
I do not recommend it. If used within the substrate, limit it to up to 5% of the mix’s volume and thoroughly incorporate it. Never pure on the soil.
Do I need to dry the grounds before composting?
No. They can go moist into the compost bin, as long as they are mixed with dry material, such as leaves, cardboard, or untreated sawdust.
Do I need to dry the grounds before storing?
Yes. Moist grounds in a closed jar will mold, clump together, and smell bad.
For storage, dry first.
Does coffee grounds acidify the soil?
Not in a significant or reliable way. Used coffee grounds tend to be near neutral, at most slightly acidic. It is not a pH adjuster.
Can I use coffee grounds on orchids?
Generally, no. Orchids and other epiphytes, like anthuriums, need a very airy substrate. The fine grounds fill up the spaces, compact the mixture, and retain too much moisture. It’s asking for trouble.
Can old brewed coffee be used on plants?
Yes, as long as it’s black coffee without sugar or milk, always diluted in water. Use occasionally and observe the plant’s response.
Do coffee grounds repel ants?
Not reliably. There may be a temporary effect in some situations, but it is not a main method of control.
Do coffee grounds kill slugs?
Solutions with caffeine affect slugs and snails, but spreading grounds in the garden is not a safe and standardized method of control. Use it with caution and do not rely on it to solve an infestation.
Can I put paper filters with grounds in the compost bin?
Yes, as long as it’s a paper filter, without plastic or synthetic material. It acts as carbon-rich material and helps balance the grounds.
Can moldy coffee grounds go into the compost bin?
Yes. Mold is part of decomposition. Just avoid handling it too much, do not inhale the spores, and do not use this moldy grounds directly in pots indoors.
How to sensibly use coffee grounds
Coffee grounds are a good example of how gardening improves when we observe the natural process instead of looking for magical shortcuts. It’s not a villain, but it’s not a miracle potion either.
The best use is simple: put it in the compost bin, mix it with dry material, and let the microorganisms do their work. Then, use the ready compost in the garden, in the flowerbed, and, judiciously, in the pot.
If you want to use it directly in the potting mix, go conservative: a small amount, at most 5% of the volume, always dry and well mixed. Never a pure layer on the soil.
And if there’s leftover brewed coffee in the pot or thermos, it also has its place: well diluted, occasionally, in the watering of an established plant or in the gentle cleaning of big, tough leaves.
Ultimately, the secret is not about turning all kitchen waste into immediate fertilizer. It lies in understanding the time of decomposition. The plant does not eat coffee grounds. The first workers are the microorganisms.