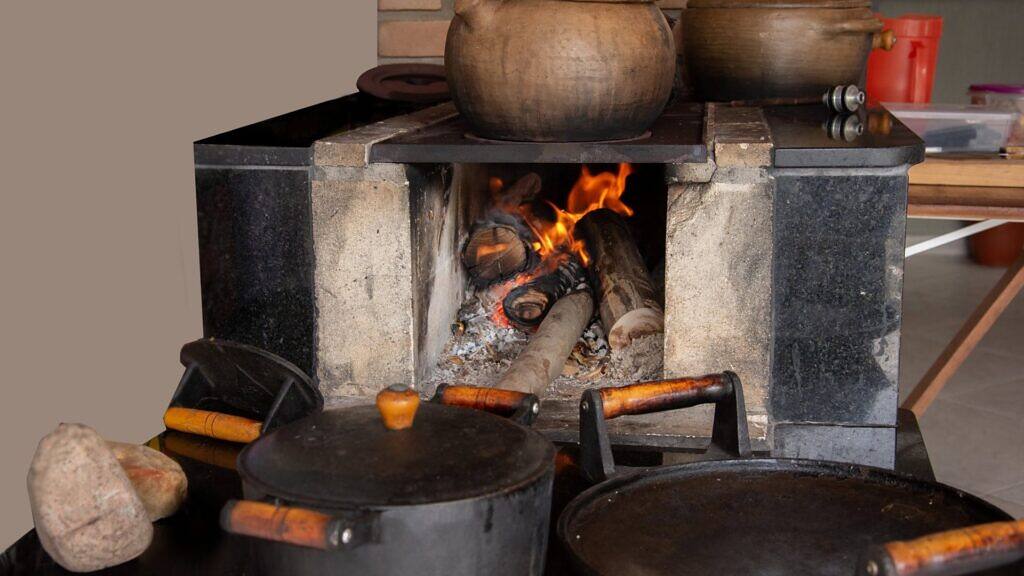
In Brazil, we live with a curious contradiction: while we throw away tons of ashes from fireplaces, wood-burning stoves, salamanders, and grills, we spend a fortune buying lime and potassium fertilizers at garden centers. Pure wood ash is a natural soil amendment, rich in potassium and calcium, and it works much faster than conventional lime.
Here in the South, where the cold bites and many homes still have the wood-burning stove inherited from grandma, I always recommend saving these ashes. In the Brazilian fall, when plants need to prepare for lower temperatures, the potassium in ash improves osmotic balance and cold tolerance in plant tissues. A plant that would suffer badly from frost can hold up better.
But be careful: wood ash is not ordinary trash. It is an active, alkaline material that requires specific handling and application precautions.
What wood ash is and how it works as a natural acidity corrector and liming agent
When wood burns completely, only the minerals the tree absorbed over years of growth remain. This gray powder is basically a concentration of nutrients, especially potassium, calcium, and magnesium. The pH of wood ash ranges from 9 to 11.5 — extremely alkaline — which explains its ability to neutralize acidic soils.
In the Brazilian market, ash serves as a substitute or complement for:
- Calcitic lime, dolomitic lime (magnesium-rich), or shell lime: To correct soil acidity
- Potassium chloride (KCl) or potassium sulfate: As an organic source of potassium
Obviously, technical corrections over large areas will require soil analysis and liming with agricultural lime. But ash, despite its variable nutrient content, has two major advantages over regular lime: the solubility and particle size. While lime can take months to start working, ash has a fast effect, changing pH within a few weeks, depending on the soil.

Nutritional benefits: The importance of potassium and calcium for plant resilience in the Brazilian fall
I always say that potassium is the “forgotten nutrient” among amateur gardeners. Everyone talks about nitrogen for green leaves, but few understand that potassium is responsible for transporting water and nutrients within the plant. Without it, sap does not circulate properly, fruits stay small, flowers lose color, and plants become vulnerable to disease.
In the fall and winter in the Southeast and South, when we have sudden temperature drops, potassium acts as an osmotic regulator — it concentrates sugars in the sap, lowering the freezing point of plant tissues. It’s as if the plant produced its own “antifreeze.”
Calcium, on the other hand, has another vital role: it strengthens cell walls. You know that blossom-end rot in tomatoes, that black, mushy bottom? That is calcium deficiency. A story I always hear in gardening groups is: “I used ash in my tomato bed and the fruits stopped getting that black spot on the bottom.” Exactly — the calcium in the ash corrected the deficiency in record time.
In addition, in acidic tropical soils, calcium neutralizes toxic aluminum, which literally “burns” plant roots.
One warning almost nobody mentions: too much potassium also causes serious problems. Since ash is naturally rich in this nutrient, frequent use or high doses can unbalance plant nutrition. Potassium competes directly with calcium and magnesium for uptake by the roots, and elevated levels can induce deficiencies even when these nutrients are present in the soil. The result is leaves with chlorosis, irregular growth, and lower fruit quality. In other words: more is not always better — especially when it comes to wood ash. Just because the fertilizer is “natural” and homemade, that doesn’t mean you can use it by the handful.
The crucial difference between pure wood ash and grill leftovers mixed with salt
Here is the number one mistake — and the deadliest — in ash use: using barbecue residue mixed with grease and salt. I call this the “barbecue mistake,” and it has killed more plants than any pest.
The sodium in table salt causes an osmotic collapse in the roots. The plant literally “dehydrates” from the inside out, even with moist soil. It is a quick, irreversible death. In addition, animal fat can attract unwanted insects and make pets dig in the soil.

Ashes that can be used:
- Virgin firewood
- Shredded and burned pruning debris
- Reforestation wood (eucalyptus, pine)
- Burned sugarcane bagasse
PROHIBITED ashes:
- Barbecue charcoal with grease and salt residue
- Treated, painted, or varnished wood (contains heavy metals and toxins that can be harmful even when inhaled)
- Cardboard with inks or glues
- Bituminous coal or industrially manufactured briquettes
Golden rule: if you do not know the exact source of the wood, do not use the ash. Simple as that.
Practical guide to preparing and applying wood ash in the vegetable garden, orchard, and containers
Now to the point: how to turn that little pile of ash into safe, effective fertilizer. I have used this method for years and have never had any problems.
Safe preparation: From collecting and cooling to sifting the residue
Step 1: Complete cooling
Ash can retain residual heat for up to 48 hours. Transfer it to a metal container with a lid (never plastic or paper) and let it cool completely. I usually leave it for three days to be absolutely sure.
Step 2: Sifting
Use a fine-mesh sieve to remove undecomposed charcoal pieces, nails, staples, and stones. This material is not useful for the garden and could even hurt your hands during application.
Step 3: Protective equipment
Ash is extremely alkaline and dries out the skin. Always wear:
- PFF2 or N95 mask (the fine dust irritates the lungs)
- Rubber gloves
- Clothing that covers arms and legs
Step 4: pH test
Before applying, do a soil test or measure your soil pH with a pocket meter. If the soil is already above pH 7, do not use ash — you will create an environment that is too alkaline, and what should help ends up causing problems.

Application methods: Incorporated dry fertilization versus making liquid ash tea
There are two classic ways to use ash, and I alternate between them depending on the situation:
Method 1: Dry application (for soil correction)
Dosage: 3.5 to 7 oz per square yard (approximately one coffee cup per square meter (100 g to 200 g per square meter)).
- Spread the ash evenly over the soil
- Lightly incorporate it with a rake or hoe (2-4 inches deep (5-10 cm))
- Water immediately — this is crucial to prevent the wind from carrying away the dust and to start the chemical reaction
- Wait at least 15 days before planting (time for the pH to stabilize)
This method is ideal for preparing new beds, vegetable gardens, and areas where the soil is very acidic (which usually happens). In orchards, I use this technique at the beginning of fall to prepare the trees for winter. In soils that have already been corrected or are fertile, use half this dose. And as you already know: do not use it on acid-loving plants.
Method 2: Liquid ash tea (for quick feeding)
Recipe: 1 cup of sifted ash per 2.6 gallons of water (10 liters of water).
- Mix the ash into the water and let it sit for 24 hours
- Stir occasionally
- Strain through a fine cloth
- Use for watering at the soil level (never on the leaves during strong sun)
This “tea” is perfect for containers and actively growing plants. The liquid potassium is absorbed quickly by the roots, and you can see results in 7-10 days: firmer leaves, more intense color, and greater resistance to pests.
An extra tip I learned from organic farmers: on mornings with dew, you can dust a very thin layer of dry ash over vegetable leaves. This creates a physical, alkaline barrier against slugs, snails, and some caterpillars. But be careful: only do this if it is not going to rain in the next few hours, otherwise the ash will wash off and have no effect.
Plants that love ash and which species should stay far away from this fertilizer
Not every plant likes alkaline soil. That is the most important rule and the one that causes the most confusion.
Plants that LOVE ash:
- Vegetables: Tomato, bell pepper, eggplant, kale, cabbage, broccoli, beet, onion
- Fruit trees: Apple tree, pear tree, fig tree, mulberry, grapevine
- Flowers: Rose bushes, chrysanthemums, carnations, lavender, geraniums
- Lawns: Especially after winter, to green up again
- Succulents: Cacti and succulents in general (they love neutral to alkaline pH – there are exceptions)
Acid-loving plants that HATE ash:
- Azaleas and rhododendrons
- Gardenias and camellias
- Hydrangeas (if you want blue flowers — alkaline pH makes them pink)
- Jabuticaba trees (in excess)
- Blueberry
- Pines and ornamental conifers
It is quite common for people to apply ash and even lime to acidophilic plants. These plants naturally prefer acidic soil (pH 5.0-6.0) in order to absorb nutrients properly. The result of this mistake is usually severe iron chlorosis — the leaves turn yellow with green veins because the pH is too high, blocking iron uptake.
Dangerous mistakes: When using wood ash can harm growth or kill the roots
Let’s talk about the mistakes I see most often — and some I made myself when I was just starting out.
Mistake 1: Applying too much in pots
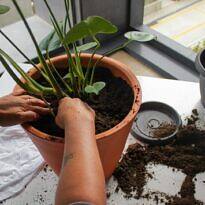
A warning I often see in forums: “Be careful when using it in small pots; the pH rises too quickly and the plant stops growing”. In pots, use at most 1 tablespoon of ash for every 1.3 gallons (5 liters) of potting mix, and always mix it into the soil, never spread it concentrated on the surface.
Mistake 2: Mixing with nitrogen fertilizers
Never, ever, under any circumstances mix ash with urea, ammonium sulfate, or any fertilizer rich in nitrogen at the time of application. The chemical reaction releases gaseous ammonia, and you literally lose the nitrogen to the air. It’s throwing money (and fertilizer) away.
If you need to use both, apply the nitrogen fertilizer first, water well, and only add the ash after 7-10 days.
Mistake 3: Using it without measuring soil pH
Naturally alkaline soils (common in the Northeast and in some regions of the Central-West) do not need ash. Applying it can raise the pH above 8.0, causing several micronutrients to become unavailable. Plants in very high pH develop chlorosis, stunting, and weak roots.
Mistake 4: Applying directly to the stem or trunk
Ash concentrated in direct contact with the stem can cause chemical burns, especially in young plants. Always apply it around the plant, keeping a distance of at least 4 inches (10 cm) from the stem.
Soil maintenance and monitoring to avoid excess alkalinity and stalled regrowth
After applying ash, the work is not over. You need to monitor the soil to ensure the pH stabilizes within the ideal range (6.0-7.0 for most plants).
Signs of excess alkalinity:
- Yellow leaves with green veins (iron chlorosis)
- Slow or halted growth
- Smaller-than-normal flowers and fruits
- Leaf tips that are burnt
If this happens, you can reverse it with:
- Acidic organic matter: Pine leaf compost, peat, or shredded pine bark
- Elemental sulfur: Lowers pH gradually (use sparingly)
- Iron sulfate: Corrects chlorosis and slightly acidifies
The ideal is to test the pH every 3 months after applying ash. I use a soil analysis or one of those pocket pH meters. The important thing is to keep it under control.
Frequently asked questions about using ash as an organic potassium source
Can I use ash on flowering plants?
Yes, but prefer diluted ash tea, applied to the soil. Potassium stimulates flowering and improves flower quality. Desert roses love potassium.
How often should I apply it?
At most twice a year: early autumn (to prepare for the cold) and early spring (to stimulate growth). More than that is too much.
Do ashes work as a pest repellent?
Yes, but mechanically, not chemically. The fine powder dehydrates slugs and snails, and the alkaline texture bothers caterpillars. But it needs to be reapplied after rain.
Can I use ash on lawns?
Yes! Spread a very thin layer (1.8 oz per square yard (50 g per m²)) at the end of winter. The lawn will turn green quickly thanks to the potassium. But be careful: in excess, it can encourage the growth of weeds that like high pH.
How long do ashes last in the soil?
The alkaline effect lasts from 6 months to 1 year, depending on the type of soil and the amount of rainfall. In sandy soils, the effect is shorter; in clay soils, longer.
Stronger gardens start with sustainable choices
I always say sustainable gardening is not about grand gestures, but about small conscious choices. Reusing wood ash is one of those choices — you reduce waste, save on industrial fertilizers, and still provide your plants with high-quality nutrients.
But remember: ashes are powerful, and power without knowledge always creates problems. Use them responsibly, measure the pH, respect acidophilic plants, and monitor the results.
In my garden, ashes turned stunted tomatoes into vigorous plants, and rose bushes that barely bloomed into shrubs covered in buds.
So the next time you clean out the fireplace or wood stove, don’t throw those ashes away. Sift them, test your soil, and offer your plants this mineral gift that nature was using long before fertilizer bags appeared on store shelves. Your vegetables, fruit trees, and flowers will thank you with strong roots, rich color, and impressive resistance to fall cold.
And if you’re just getting started, begin small: test it in a limited area, watch the results, and adjust. Gardening is about patience, observation, and constant learning. I still learn something new every season — and you will too.