How many times have you bought gorgeous seedlings, prepared the bed with compost, planted everything with care… and even so your plants stayed stunted, with yellowing leaves and underdeveloped roots? The problem often isn’t what you did, but what you failed to do before anything else: agricultural liming. In my work as a landscape designer, I’ve lost count of how many gardens seemed doomed until we discovered that the soil was so acidic the aluminum was literally poisoning the roots. Only after correcting the pH did everything change.
Why your garden needs liming even before planting
In many regions, especially those with older, highly weathered soils and heavy rainfall, soils tend to be naturally acidic. When the pH drops below 5.5, something invisible but devastating happens: the aluminum in the soil converts into a toxic form (Al³⁺) that burns root tips, preventing plants from exploring deeper layers in search of water and nutrients.
I usually explain it to my clients like this: imagine trying to eat with a badly burned mouth. You might manage a few bites, but it hurts, it’s difficult, and you give up halfway through the meal. That is exactly what happens to plant roots in soil that is too acidic. No matter how much you fertilize, water, and care for your plants, they simply can’t make proper use of any of it.
On top of that, excessive acidity disrupts the entire microscopic life of the soil. Nitrogen-fixing bacteria (those that literally “manufacture” free fertilizer) and beneficial fungi (which help roots absorb phosphorus) only work properly when the pH is between 6.0 and 6.5. Outside this range, it’s as if you shut down an entire nutrient factory.

What soil liming is and how it neutralizes soil acidity
Liming is the process of applying agricultural lime (a ground rock rich in calcium and magnesium) to the soil to correct acidity and neutralize toxic aluminum. It’s not just about “raising the pH” — that’s an oversimplification that can be misleading. The real goal is to create a chemically balanced environment where roots can grow freely and nutrients remain available.
When agricultural lime is spread over the soil, it reacts slowly with water and begins to release calcium (Ca²⁺) and magnesium (Mg²⁺).
These elements perform a true chemical cleansing: they push the toxic aluminum out of the soil solution, taking over the exchange sites on the clay particles where it used to be attached. The aluminum is then converted into harmless forms.
But there is a critical detail that many people overlook: limestone moves very slowly in the soil. If you only spread it on the surface and don’t work it into the ground, it can take years—literally years—to reach the depth where the roots are. That’s why incorporation is essential, and I will show you exactly how to do it.

Types of limestone available on the market and which one to choose for your garden
When you go to a garden center, you will basically find three types of limestone—and each one behaves differently. Let me introduce them:
Dolomitic limestone: The favorite for home gardens
This is the most common option and, in my opinion, the best limestone for most residential gardens. It contains both calcium and magnesium in balanced proportions, which is ideal because both are essential nutrients. I use this type in about 90% of my projects.
Calcitic limestone: For specific situations
Rich in calcium but low in magnesium. I only recommend it when a soil test shows that magnesium is already at high levels (which is uncommon in urban gardens). It is usually sold as “Agricultural Limestone” or “Standard Agricultural Lime.” If you have not done a soil analysis, choose dolomitic limestone.
Filler limestone: The short‑distance sprinter
This type has an ultrafine particle size—almost like talcum powder. Its main advantage is its very fast reaction: it starts working within a few weeks, while other types may take months. The downside? It is used up more quickly and has a lower residual effect. I use this type of limestone when I need an emergency correction, but it is not my first choice for established, long‑term garden beds.
Agricultural gypsum: Don’t mix them up!
Many people think gypsum is limestone, but they are completely different materials. Gypsum does not change soil pH—it is used to supply calcium and sulfur deeper in the soil profile and to improve the structure of heavy clay soils. Use limestone and gypsum together if your soil is very compacted, but never substitute one for the other.
Gypsum is also very useful when you want to plant acid‑loving species such as azaleas, rhododendrons, and camellias.
A golden tip: always check the PRNT (Relative Total Neutralizing Power) on the package. This number indicates how “strong” the garden lime is. If it is lower than 70%, you will need much more product to achieve the same effect. Always look for PRNT above 80%.

Materials, tools, and safety equipment for soil preparation
Before you get your hands in the dirt, you need to get organized. Liming is not complicated, but it does require planning. Here is what I always bring to my soil preparation projects:
For soil sampling
- Soil auger or soil probe (that tool that looks like a corkscrew for soil) — if you do not have one, a narrow hoe will do the job
- Clean plastic bucket — never use a metal bucket, because it contaminates the sample
- New plastic bags to store the sample
- Label and permanent marker for identification
For applying garden lime
- Lime spreader (if the area is larger than 1,000 ft² (100 m²)) — you can rent one if you do not want to buy it.
- Round‑point shovel and rake for spreading by hand in small areas
- Hoe or power tiller for incorporation
- Watering can or garden hose with a diffuser nozzle
Personal Protective Equipment (do not skip this!)
Lime is a very fine dust that can badly irritate your airways and eyes. I learned this the hard way when I worked without a mask on a windy day and coughed all night long. Always use:
- PFF2 or N95 mask
- Safety goggles
- Gardening gloves
- Long‑sleeved shirt (if it is very windy)

Step‑by‑step liming guide: from soil testing to correct application
Now comes the practical part. I will guide you through the entire liming process, exactly the way I do it when establishing gardens.
The secret lies in patience and in respecting the timeline.
Soil sampling and interpretation of the lab test
Start this process 100 days before planting, that is, during the planning phase. Seriously. Liming is not instantaneous, and you need that lead time. Here is the correct protocol:
- Mentally divide your yard or garden into similar areas (lawn, shade beds, full-sun beds)
- In each area, collect 10 to 15 subsamples at different spots, from 0 to 8 inches (0–20cm) deep
- Mix everything in a plastic bucket, breaking up any clods
- Remove about 1 pound (approximately 500g) of this mixture and place it in a labeled plastic bag
- Send it to a soil testing laboratory (search online for a “soil testing lab” or use your local extension service). If there is no lab nearby, you can mail the sample to a specialized soil testing lab.
When the results come back, you will receive a table full of numbers. The ones that matter for liming are:
- pH in water: Ideally should be between 6.0 and 6.5 for most ornamental plants
- V% (Base Saturation): Indicates what percentage of the exchange sites in the clay are occupied by beneficial nutrients (Ca, Mg, K) instead of aluminum. The ideal range is 60–70%
- Aluminum (Al³⁺): This is the villain. The lower, the better
- Calcium and Magnesium: Used to confirm which type of agricultural lime to apply
Consult a reliable soil test interpretation guide from your local university extension or agricultural service whenever you have questions about how to adjust soil pH and base saturation.

Calculating the lime rate and choosing the ideal lime for correction
This is where the math comes in—the job of an agronomist or soil specialist. The basic formula for liming is:
NC (tons/acre) = (V2 – V1) × T ÷ ECCE
Where:
• V2 = Desired base saturation (usually 60–70%)
• V1 = Current base saturation (shown on the test report)
• T = CEC (Cation Exchange Capacity, also on the report)
• ECCE = Effective calcium carbonate equivalent of the lime (listed on the product label)
Practical example from a project: Soil with V1 = 30%, desired V2 = 65%, T = 8, and lime ECCE = 85%.
NC = (65 – 30) × 8 ÷ 85 = 3.3 tons/acre (approximately 3.3 tons/hectare)
Since 1 acre is about 43,560 square feet (approximately 4,047m²), and my garden bed was about 540 square feet (50m²), I needed for my soil pH adjustment:
3,300kg ÷ 200 = 16.5kg of lime (about 36 pounds of lime for that bed).
If you don’t want to do the math: many labs already provide a ready-made lime recommendation. Ask if they offer this service. If you forgot to request it, you can consult an agronomist, who will calculate and prepare the soil pH adjustment guidelines for you. And if you didn’t run a soil test (although I strongly recommend that you do), a “standard” rate of 7 oz per 10 sq ft (200 g por m²) of dolomitic lime with an ECCE of 85% generally works for light corrections in urban gardens.

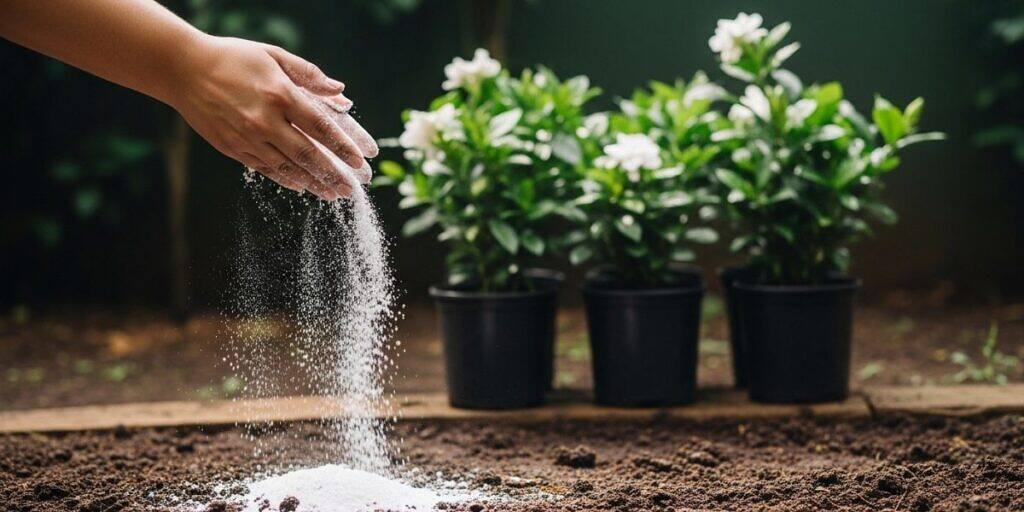
Application, incorporation into the soil, and the required waiting period
Now we finally get our hands dirty. Choose a dry, calm day with no wind — your throat will thank you.
Step 1 — Distribution (T-minus 90 days before planting):
Spread the lime evenly over the soil. If you’re using a mechanical spreader, make two overlapping passes (one north–south, the other east–west) to ensure uniform coverage. If you’re applying by hand, divide the total into small buckets and spread it as if you were salting a giant steak — broad, steady movements.
Step 2 — Incorporation (on the same day):
Here is the big secret that separates average soil pH adjustment from truly outstanding results. You MUST till the soil to mix the lime down to about 8 in (20 cm) deep. Use a hoe, grub hoe, or a rototiller. Remember: lime does not move down on its own. If it stays on the surface, you’ve wasted time and money.
I usually do it like this: first I run the rototiller, then I level the area with a rake, and then I water lightly to help it settle. In small beds, a good thorough “turning” with a grub hoe is enough.
Step 3 — Moisture and reaction:
Lime only reacts in the presence of water. If you applied it during a dry spell, it will just sit there, inert, waiting for the first rainfall. That’s why I always give a light watering after incorporating it — no need to soak the area, just moisten it.
Step 4 — Wait 60 to 90 days:
This is the hardest part for gardeners who are impatient (I completely understand). But waiting is essential. The chemical reaction of soil pH adjustment with lime is slow and gradual. If you plant too early, you can cause “burning” of young roots and a temporary unavailability of micronutrients.
Use this time to plan your garden, choose your plants, and prepare compost. When the 60–90 days are over, you can apply your NPK fertilizer and plant safely.

Common mistakes and special care with plants that prefer acidic soil
I want to share the mistakes I see over and over again — including some I made myself early in my career.
Planting right away: Mistake no. 1
Many people forget that agricultural lime takes time to work. I applied it in a client’s garden and the plants only really started to respond about 3 months later, right at the beginning of spring. The homeowner kept calling, worried, thinking they had wasted money. It took a lot of patience to explain that the soil was “healing” from the inside.
Replacing lime with ashes: Dangerous creativity
I often get messages from people asking if they can use charcoal ashes. Technically, wood ash can change soil pH, but it does not provide the balanced calcium and magnesium plants need, and it can increase soil salinity depending on the source of the ash. Use proper agricultural lime.
Over-liming: When the cure becomes the problem
The biggest mistake in urban gardens is liming without a soil test. Construction debris (cement, mortar) naturally tends to make the soil alkaline. If you apply lime “by eye” on top of that, you can push the pH above 7.0, and then the opposite happens: iron, zinc, and manganese become “locked” in the soil, causing that chlorosis (yellowing) on the youngest leaves. I saw this a lot during my veterinary studies, visiting dairy farms that received subsidies for liming their pastures and applied it year after year. At some point it became excessive.
That’s why I insist so much on soil analysis. A basic soil test is inexpensive and easily accessible, and it can save you hundreds of dollars in dead plants and wasted lime, especially when you grow plants that prefer acidic soil.
Don’t overlook acid-loving plants: Not everything wants a neutral pH
Some plants are the exact opposite of everything we’ve discussed so far — they thrive in acidic soil. If you’re planning a garden with:
- Azaleas
- Gardenias
- Blue hydrangeas (they only turn blue at low pH!)
- Camellias
- Rhododendrons
- Certain ferns
Do NOT add lime to these beds! Or, if the soil is extremely acidic (pH below 4.5), apply only a very light pH adjustment to bring it up to 5.0–5.5, but don’t go beyond that.

Beyond pH: How aluminum and soil biology affect root health
Here’s something most gardening guides leave out, but it makes a huge difference in real-world garden pH management.
The real enemy isn’t low pH itself — it’s toxic aluminum. When the soil is very acidic, aluminum ions (Al³⁺) are released from clay particles and become free in the soil solution. They then attach to the tips of new roots (the root apices) and literally burn them, preventing root growth.
Imagine trying to explore the soil for water with your “hands” burned. The plant becomes trapped in a very shallow layer of soil and can’t grow deeper. That’s why plants in overly acidic soil wilt at the first hint of drought — their roots are far too shallow.
But there’s more. The ideal garden pH (6.0–6.5) is the range of maximum microbial activity. In this band:
- Nitrogen-fixing bacteria (Rhizobium, Azospirillum) work at peak efficiency
- Mycorrhizal fungi (which can increase the plant’s ability to absorb phosphorus by up to 10 times) colonize the roots more easily
- Earthworms and other decomposers speed up humus formation
When you apply lime to adjust garden pH, you’re not just “changing a number” — you’re reactivating an entire underground biological factory that works 24 hours a day to feed your plants. It’s remarkable to watch it in action.

Frequently asked questions about liming and soil correction in the garden
Can I apply lime at any time of the year?
Technically, yes, but the ideal time is late winter (August–September), so the reaction is complete by spring, when you’ll be planting. Avoid applying during periods of severe drought, because without moisture there is no reaction.
How long does the effect of agricultural lime last?
It depends on soil type and rainfall, but generally from 2 to 4 years. Sandy soils and very rainy regions require more frequent re-liming. In acidic soils, you can apply agricultural lime for at least two consecutive years, then increase the interval to every two years or more afterward. Run a soil test every 2–3 years to monitor.
Can I mix agricultural lime with organic compost?
You not only can, you should. I always recommend: first incorporate the agricultural lime, then, about 15 days (two weeks) before planting, add the compost. The two complement each other perfectly.
And what if I overdid it and the soil became too alkaline?
That’s where it gets tricky. Lowering pH is harder than raising it. You can use elemental sulfur or acidic peat, but it’s a slow process. That’s why I always say: soil test first, choose the plants, application afterward.
Do I need to remove the plants to apply agricultural lime?
In established gardens, apply a surface liming (application without deep incorporation) around the plants, keeping a distance of 4 in (10 cm) from the stem. The reaction will be slower, but it prevents damage to existing roots. Increase the amount of organic matter. Naturally and gradually, soil microfauna activity will move the more superficial layers down to the deeper ones.

A vigorous garden starts with well-prepared, well-balanced soil
I know that 90 days can feel like an eternity when you’re eager to see your garden in full bloom. But I assure you: it’s the best time investment you can make. Every project in which I followed this liming protocol resulted in more vigorous plants, more abundant flowering, and far fewer headaches with nutrient deficiencies.
Agricultural lime is not glamorous.
No one is ever going to compliment you on well‑prepared soil (especially because it’s hidden). But that’s what supports everything. It’s the invisible foundation of the garden of your dreams.
So if you’re planning a new garden or renovating an old bed, start with a soil test right away. While you wait for the results, research the plants you want to grow, plan your layout, dream about the colors. And when it’s time to plant—with the pH adjusted, excess aluminum neutralized, and the soil biology buzzing with life—you’ll understand why I’m so insistent about proper liming and soil preparation.
Your garden deserves that solid base. And your plants will thank you with deep roots, lush foliage, and a resilience that will surprise you. Trust the process—I’ve watched this transformation hundreds of times, and it never stops feeling a bit magical.