You know that grayish layer that forms on houseplant leaves? Well, besides dust, it’s a mix of urban pollution, cigarette residue (if someone smokes nearby), and even tiny kitchen-oil particles that stick to the leaves like a second skin.
And usually books, websites, and gardening tips recommend wiping the leaves with a cloth to remove that grime. That advice may even work for a few plants with large, sturdy leaves. But now consider that I’m a fanatic with lots of plants, and lots of plants with small, finely cut, delicate leaves, like maidenhair ferns and ferns. In those cases, following the “wipe the leaves with a cloth” advice is a recipe for you to get nothing else done for the rest of the day, besides damaging the delicate leaves.
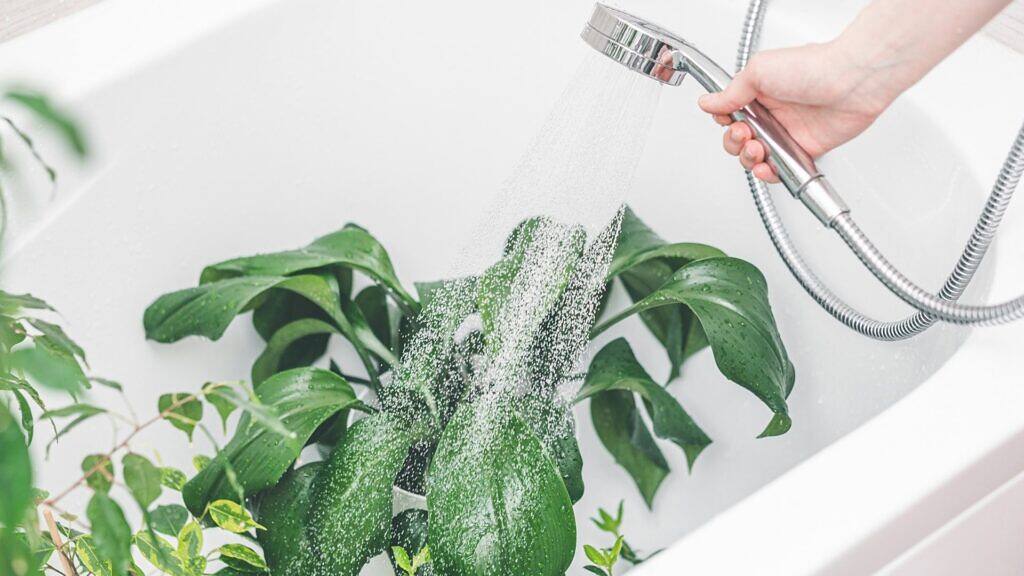
People who live in houses can gather all the plants in the backyard on a cloudy day and give them a generous shower with a hose. But what about those of us who live in apartments, like me? That’s when I started taking my little plants into the shower, and the difference was so absurd that it became a monthly ritual here at home.
Why showering plants is the secret to shiny, healthy leaves
The truth is that photosynthesis happens through light hitting the leaves and the gas exchange carried out by the leaf pores (the stomata). When the leaf is covered in dust and the pores are clogged with grime, the plant literally suffocates and starves to death. It’s like trying to breathe with your nose plugged — you can survive, but you can’t live well. A shower solves this in a way no damp cloth can: the volume and pressure of the water remove deep layers of residue that become embedded on the leaf surface. It also washes away salts accumulated from foliar feeding, and even pests that were thinking about moving in, like aphids, whiteflies, or scale insects, can go down the drain.
In addition, there’s an extra benefit that not many people talk about: a shower helps break the breeding cycle of spider mites. These microscopic little creatures hate humid environments, and the stream of water literally sweeps away the colonies living on the undersides of the leaves. It’s prevention and cleaning at the same time.
Regular leaf cleaning isn’t just about looks — it improves light absorption by up to 20% in plants with dense foliage. In other words: clean leaves work better, grow faster, and keep that magazine-worthy vibrant green.

The role of foliar cleaning in photosynthesis and pest control
Let’s be honest: houseplants were not made to live indoors. They evolved under tropical rains that naturally washed their leaves clean. When we bring a pothos or a monstera into an apartment, we’re removing it from that natural cleaning cycle. Urban dust — full of heavy oil particles, soot, and pollutants — builds up and creates a physical barrier against light.
In big cities, that layer of dirt is even worse. Have you noticed how the leaves near the window get dirtier than the ones at the back of the room? That’s because ventilation brings in microscopic pollution particles that cling to the leaves’ natural moisture. Over time, this becomes a perfect breeding ground for fungi and scale insects — pests that love dirty, stuffy environments.
A shower simulates tropical rain and gives the plant that “reset” it would get in nature. It’s like washing your face before bed — not a luxury, basic hygiene.
Practical guide: how to shower plants the right way
Now comes the good part. I’m going to teach you the step-by-step method I use at home, without worrying about making a mistake or soaking the potting mix. The technique seems simple, but the details make all the difference between a refreshed plant and a waterlogged pot that will rot the roots.
Preparing the pot and the shower stall
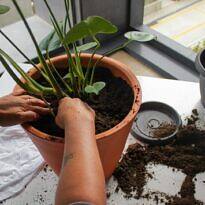
First things first: protect the potting mix and the mulch. I know it sounds picky, but trust me — showering directly without protection makes a huge mess of soil and pine bark chips scattered everywhere and clogging the drain. Don’t worry if the potting mix gets wet; the important thing is to protect the potting mix and the top dressing from the force of the water.
Use cloths (that can be cleaned afterward and reused) to protect the potting mix. Cardboard discs will also do, but you’ll have to throw them away afterward. Some people prefer to place the pot inside a grocery bag and tie it gently near the plant’s stem. Be creative and find a solution that is practical for you.
Extra tip: Place a screen over the drain. This step also keeps pieces of coco fiber, fallen leaves, or pine bark from going down the shower drain and clogging the plumbing.
“If the potting mix falls, the coco fiber clogs the drain in a second” — and unclogging a bathroom shower is no fun, trust me.
Adjusting water temperature and choosing support accessories
Here’s a mistake I see everyone making: showering plants with ice-cold or too-hot water. Tropical plants like the temperature of rainforest rain, which is always lukewarm (between 68°F and 77°F (20°C and 25°C)). Ice-cold water causes thermal shock and can create necrotic spots on the leaves; hot water literally cooks plant cells. And we don’t want a stew, do we?
Leave the shower running for about 30 seconds before placing the plant underneath. Test the temperature with your hand — it should be a little cooler than what you would use for your own shower. The water should be lukewarm, or at room temperature: neither boiling hot nor cold.
As for accessories:
- Plastic stool: Raising the pot prevents it from coming into direct contact with soap residue on the shower floor. I use a low stool, the kind made for children.
- Handheld showerhead: If your shower has a handheld sprayer, even better. It makes it much easier to direct the stream onto the leaves without wasting water. You can even aim it at the undersides of the leaves.
- Rolling plant stand: For large plants (Monstera deliciosa, Pacová), it’s worth investing in a stand with wheels. It makes it easier to move them to the bathroom without strain and protects your back.

Efficient washing technique: From hygiene to pest control
For anyone dealing with large collections or plants exposed to kitchen grease, shower bathing needs to be a logistical operation, not just an individual care task. The focus here is time optimization and efficiency. These days, this task has to be practical.
Pre-treatment for Kitchen Plants (Grease)
Dust mixed with cooking grease creates an impermeable layer that the water stream alone cannot remove. Before taking the plant to the shower:
- Homemade degreasing spray: Prepare a solution of 17 fl oz (500 ml) of water with 1 teaspoon of mild dish soap.
- Application: Spray generously on both sides of the leaves. The soap works by breaking the surface tension of the grease.
- Contact time: Let it act for 2 to 5 minutes (without letting it dry) before rinsing in the shower. Water that is a little warmer can help here.
Plants with small leaflets or thin tissues cannot withstand the direct pressure of high-pressure showers, which can cause tearing and knock leaves off. Try reducing the pressure if it is adjustable.
Batch Washing (urban jungle)
For those with many plants, washing them one by one is counterproductive. Organize the process in a “assembly-line vibe”:
- Grouping: Place as many pots as fit on the shower floor (or on plastic trays to make transport easier).
- Vertical washing: Start with the tallest or trailing plants. The water running off them already begins pre-washing the smaller plants below.
- Focus on the undersides: With the handheld showerhead (if available), make quick sweeps from bottom to top. Mites and other pests live on the underside; pressurized water acts as a physical control, dislodging the colonies.
- Drainage and pot cleaning: Take advantage of the flow to wash the sides of the pots and the saucer, removing salt deposits and mosquito larvae.
Pro Tip: After showering, avoid returning the plants immediately to direct sun or very breezy locations. Let them drain in the shower until the plant’s “center” is no longer waterlogged, preventing rotting of the growing point (common in orchids and bromeliads).

Drainage and specific care
After bathing, do not put the plant back immediately. Let it rest in the shower or on the sink for 30 to 60 minutes. Excess water needs to drain completely from the saucers, drainage holes, and the center of the leaves.
Special care with:
- Orchids: In orchids such as Phalaenopsis, the crown (that little point where new leaves emerge) cannot stay wet. Use paper towels and dry it gently. If water collects there, it can rot and kill the plant.
- Bromeliads: In this case, it’s fine to leave the water in the center. Bromeliads like to drink water there, so it’s good to leave a little water.
- Succulents: Just like with orchids, avoid leaving the crown damp to prevent rot. Do not wash them too often, and do not scrub, so you don’t accidentally remove the farina.
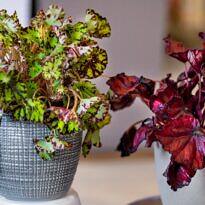
- Plants with velvety leaves: African violets, Gloxinias, and some Begonias have hairs on their leaves (trichomes) that hold water. These plants can go in the shower, but with wider spacing and preferably on dry, warm days so they dry faster. Wet fuzzy leaves are a sure recipe for fungus and rot.
Common mistakes that can compromise your plants’ health
I’m going to tell you about the mistakes I see all the time (and that can cost your garden dearly):
1. Putting the plant in the sun right after the shower: Water droplets act like magnifying lenses (a magnifying-glass effect) and cause severe burns to leaf tissue. After showering, the plant should stay in a shaded, well-ventilated place until it is completely dry.
2. Immersion baths: Avoid submerging the pot in buckets. This method disturbs the potting mix, makes an unnecessary mess in the area, and, most seriously, facilitates cross-contamination. If one plant has a pest or fungus, the immersion water will act as a transport medium to infect all the others.
3. Using mineral oil or “leaf shine”: Never use these products. They create a non-plant-based oily film that covers the stomata (pores) of the plant, preventing respiration. In addition, this sticky layer increases the adhesion of dust and soot, requiring increasingly frequent cleanings.
4. Forgetting to dry the crown: Orchids and succulents do not tolerate water left in the center (growing tip). If there is no quick ventilation, the growing point rots within a few days.
Preventive maintenance: ideal temperature and ergonomics during transport
Some logistical care I learned in practice to make the process efficient and safe:
Strict Temperature: Keep it always between 68°F and 77°F (20°C and 25°C). Use your wrist to test it — if it feels comfortable to you, it will be safe for the plant. Thermal shock (cold water) causes irreversible yellowish spots.
Ergonomics in Handling: Wet large plants get extremely heavy. Do not strain your lower back lifting pots from the floor. Use wheeled supports to transport them to the bathroom. If the pot is too large for the shower stall, prefer localized manual cleaning in place, but never risk your physical health because of improper handling.

Frequently asked questions about showering plants
How often should I do this?
It depends on the environment. In places with a lot of urban pollution or construction dust, once a month is ideal. In cleaner environments, every 60 days is enough to keep the photosynthetic rate high.
Can I use soap to remove tough dirt?
Only neutral detergent diluted in a spray, as in the grease pre-treatment technique. Forget bar soap or all-purpose products. The goal is to break down grease, not chemically damage the leaf cuticle.
What if I don’t have a handheld shower?
Use a pre-pressurized trigger sprayer or a watering can with a narrow spout. What matters is the water volume and the direction of the jet (especially on the underside of the leaves) to dislodge pests mechanically.
Can I shower newly purchased plants?
Yes! It’s an excellent quarantine measure. The shower helps remove greenhouse chemical residues and any pests that may have come with transport, making it easier for them to acclimate to the new home.
Renewing your garden through the simulation of tropical rain
What is most impressive about the shower ritual is the plant’s immediate response. Within a few days, the leaves look more vigorous and their colors become more beautiful and glossy. Many resume growing, and others even bloom in gratitude. It is visual proof that, by removing the physical barrier of dirt, the plant has regained its full ability to produce energy.
Recently, I applied this protocol to a Boston fern that had stagnated. In less than a month, it was putting out new growth. There is no mystical secret: it is simply ensuring that the stomata are free for gas exchange and that the surface is clean to capture every available photon of light.
Therefore, think of showering not as a household chore, but as a vital technical maintenance. Set aside a moment, organize the transport logistics, protect the potting mix, and offer this “reset” to your plants. They will reward you with a vigor that no fertilizer alone can provide.