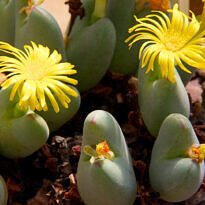
Photo: Amberdc
In line with the latest global trends in gardening, sustainability, and more functional spaces, we suggest an element that is becoming increasingly present in contemporary gardens: the Herb Spiral.
The spiral pattern is a common occurrence in nature, found in everything from small shells to constellations. Spirals respect natural curves, are highly decorative, and seamlessly integrate with gardens, connecting people with the environment.
Herb spirals can perfectly suit our needs. They can consist exclusively of medicinal plants, as well as aromatic and culinary herbs. Spirals can also include flowers and ground covers or be a mixture of your favorite plants, whether they are medicinal, aromatic, edible, or delicate and colorful flowers.
They create various microclimates in a small space, catering to plants with diverse needs. At the top of the spiral, you usually have a drier, sunnier environment, suitable for plants like rosemary, lavender, and aloe vera, among others adapted to such conditions. Along the curved path to the base, you can have shaded and moister spots for more demanding plants like tomatoes, strawberries, mallow, chives, parsley, etc. At the base, which can be at ground level or even incorporate a small pond, you can plant moisture-loving species like basil and thyme.
Spirals can come in any size and are perfect for small spaces. The key is to ensure that all herbs, from top to bottom, are within reach. Generally, they have a diameter of 1 to 1.6 meters and a height of 0.6 to 1.3 meters. The installation site should have level soil and be quickly and easily accessible, preferably close to the kitchen door.

Arrange the spiral structure on the cardboard
Photo: JoePhoto
The essential materials for building spirals are inexpensive and easy to find. The structure can be made from stones, bricks, bamboo, or small logs of wood. For the “filling,” let’s mix garden soil, sand, worm castings, and a bit of organic fertilizer like composted cow manure, bone meal, castor meal, etc.
First, lay down a layer of cardboard where the construction will take place. The cardboard will help retain moisture in the area. Start by outlining the spiral using a string or a colored substance different from the cardboard, such as chalk, sand, coffee grounds, or limestone. After the spaces are marked out, begin building the structure by placing stones or bricks in rows and adding more material toward the center and upwards.
Don’t worry if there are gaps in the structure; they’ll serve as shelters for small predators and pollinators. Fill the spiral with the prepared soil and plant the seedlings, pressing them slightly with your hands to ensure they’re secure.

Apply mulch over the soil
Photo: JoePhoto
A good mulch, such as leaves, straw, or wood shavings, will help maintain moisture and protect your herb spiral from erosion initially.
Now, simply water your herb spiral regularly. In a few weeks, you’ll be able to enjoy fresh herbs, picked right when you need them, for your afternoon tea or to season your Sunday lunch. A sustainable and beautiful solution for growing herbs in your garden.