It’s not uncommon to find an old orange tree (or another Citrus, such as pink lemon or Tahiti) in backyards. And believe it or not, this is the nightmare of many citrus growers and agronomists.
But why do orange producers dislike us having citrus trees in our backyard or home orchard?
Those who think it’s because of competition are mistaken. One might think that if I grow my own oranges, I won’t buy oranges at the market. But this thought doesn’t align with reality.
The truth is that the orange trees in our backyards don’t receive the proper phytosanitary management to keep them healthy and free of issues. As a result, our plants become a continuous source of diseases and pests that contaminate commercial orchards, causing producers to work hard and spend gallons of pesticides annually to keep their trees productive. And for the same reason, the sale of pink lemons or myrtle is not allowed in many cities.
Did you know that?
Well… it was talking to a Garden Center owner that I got the idea to write this article. He complained that the authorities wouldn’t allow him to sell certain seedlings in the city, and that was precisely the reason.
Simply prohibiting the purchase or ignoring that people have orange and lemon trees at home doesn’t solve the issue (and it doesn’t prevent the black market). As always, I believe that education is the best answer!
And to help you rejuvenate your old orange tree and keep your fruit trees healthy and productive, I decided to create this guide with a simple but comprehensive, straight-to-the-point step-by-step process. Here, you’ll learn the right techniques to revive an abandoned tree!

So, if you already have an old orange tree in your yard that’s aging and tired and you want to rejuvenate it, you’re in the right place. In this article, we’ll explore a comprehensive seven-step guide to bring vitality back to your orange tree. We’ll cover crucial topics such as strategic pruning, organic and mineral nutrition, pest control, disease treatment, lichen and epiphyte removal, and fruit thinning. By applying these strategies, you can enjoy healthy and delicious oranges in your own backyard.
And if you have other citrus plants, such as lemon or tangerine trees, feel free to apply the same techniques to these trees. In fact, most of these techniques can be applied to all fruit trees.
Reviving Your Orange Tree in Practice:
Step 1: Strategic Pruning
Why Prune Your Orange Tree?
Pruning is the first step to revitalize your orange tree. But before we delve into pruning techniques, it’s important to understand why pruning is crucial for your tree’s health. Pruning serves several purposes:
- Removal of Diseased and Damaged Branches: The first priority in pruning is to eliminate diseased, dead, or damaged branches. This prevents the spread of diseases and prevents weak or broken branches from compromising the tree’s structure.
- Improved Air and Light Circulation: Proper pruning allows better air circulation and exposure to sunlight throughout the tree. This is essential for leaf growth and the production of healthy fruits. Forget about that cartoonish tree with a round and full canopy. The goal here is for light to reach the center of the plant. A bowl-shaped appearance is desired, with branches reduced for better air circulation.
- Stimulation of New Growth: Pruning can also stimulate the growth of new shoots and branches, which is important for continuous fruit production. The top branches of the tree, which often produce fruits that we can’t reach, can be reduced. This way, light penetrates the canopy, and the tree receives a new stimulus for both leaf sprouting and fruiting.
The best time for pruning orange trees is at the end of winter or the beginning of spring, before the onset of active growth in the spring. Avoid pruning during the fall when the tree is preparing for winter or in the height of summer when the heat can stress the tree.

When pruning, start by removing all dead, diseased, or damaged branches. Use proper tools to make clean cuts. Thick branches will require a good saw, while thinner ones can be removed with pruning shears. Eliminate branches that are growing in the wrong direction or crossing other branches. This prevents them from rubbing against each other and causing damage. Clean your tools with a cloth soaked in alcohol between one tree and another.
Remember to remove water sprouts. Many trees in our yard are grafted plants, and it is not uncommon for overly vigorous branches to emerge from the rootstock (horse). They steal the energy that would be directed to the graft (scion), which is why they are called water sprouts.
Be careful not to get carried away. Do not remove more than one-third of the tree’s canopy in a single season. A tree that is too congested should be pruned in stages. Do not try to turn your exhausted tree into a champion in the first year.
Remember that pruning is an art, and each orange tree is unique. Pay attention to the specific needs of your tree and do not hesitate to seek guidance from an agronomist or agricultural technician if you do not feel confident about pruning. With proper strategic pruning, you will be on the right path to rejuvenating your orange tree and reaping the benefits of a healthy and productive tree.

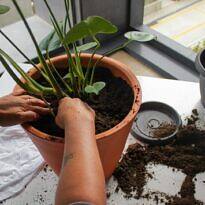
Step 2: Organic and Mineral Fertilization
A healthy orange tree requires a balanced diet. Use a fertilizer with macro and micronutrients. Additionally, add organic compost around the base of the tree to improve soil structure, stimulate beneficial microorganisms, and enhance soil aeration and water retention. Remember that the orange tree needs calcium to prevent diseases like fruit tip rot. So, the application of lime is essential at the beginning of our nutrition program.
In addition to providing calcium and magnesium, limestone neutralizes the acidic pH of the soil, allowing the absorption of all other nutrients. Skipping this step is essentially like throwing money away, as well as contaminating the environment with a fertilizer that won’t be absorbed. If your orchard soil is already neutral, the application of gypsum will provide calcium and sulfur without altering the pH.

Nutrition is one of the fundamental aspects to maintain a healthy and productive orange tree. However, often, the application of fertilizers can be ineffective if not done strategically. An effective technique to ensure that your orange tree receives the necessary nutrients is the application under the canopy projection. In this topic, we will explore how to use this technique to provide organic and mineral nutrition efficiently.
How to Fertilize in the Canopy Projection Area?
This approach takes into account the area on the ground where the tree’s canopy projects, where most of the fine absorbing roots are located. It is important to understand that the roots extend as far as the canopy projects, and it is in this area that most of the absorption activity occurs. Therefore, applying fertilizers in this region is an effective way to provide the orange tree with the nutrients it needs.
Organic and Mineral Nutrition: Finding the Balance
Balanced nutrition is essential for the healthy growth and development of the orange tree. It is recommended to use a combination of organic and mineral fertilizers to ensure that the tree obtains all the necessary nutrients.
- Organic Fertilizers: Organic compost is an excellent source of nutrients for your orange tree. Spread a layer of organic compost around the base of the tree, making sure it reaches the canopy projection. This not only provides essential nutrients but also improves soil structure, promoting water retention.
- Mineral Fertilizers: Mineral fertilizers are useful for providing specific nutrients that may be deficient in the soil. It is important to conduct a soil test to determine which nutrients are lacking. This allows you to apply mineral fertilizers accurately, avoiding excesses that can harm the tree. The test will help analyze the terrain and assist not only your orange tree but all the other trees, shrubs, and herbs in your garden.
How to Apply Nutrition in the Canopy Projection Area:
- Identify the Canopy Projection: Begin by determining the exact area of the canopy projection of your orange tree. This can be done by observing the tree’s shadow during the day. Mark this area for clear reference. Remove weeds from the location, which compete with your tree for nutrients. If there is any intentional ground cover, especially a leguminous one, such as peanut grass, keep it but do a shallow pruning.
- Spread Organic Fertilizers: Apply organic compost evenly throughout the canopy projection area, starting from the base of the tree and extending outward. This ensures that the absorbing roots have easy access to organic nutrients. Do not apply fertilizers directly to the tree trunk. This region, called the “collar,” is sensitive to fertilizer chemicals and is unable to absorb nutrients. So make sure that the fertilizers do not come into contact with the tree trunk.
- Application of Mineral Fertilizers: If the soil test reveals specific nutrient deficiencies, apply mineral fertilizers according to the manufacturer’s instructions. Remember to distribute the fertilizers evenly in the canopy projection area. Concentrated application of NPK fertilizers will cause burns and even the death of capillary roots. If you prefer, you can use slow-release fertilizers that will nourish the tree gradually. Do not forget to apply micronutrients. Most common garden fertilizers contain only nitrogen, phosphorus, and potassium, and your tree needs many more minerals for full development and recovery.
- Apply Mulch: After adding the fertilizers to the soil, cover the material with mulch. In other words, a mulch cover that protects the fertilizers from the soil, helps maintain moisture, and assists in the restructuring and protection of the soil around the tree. Use coarse sawdust, pine bark, straw, or other slow-decomposing materials.

By combining organic and mineral nutrition in a balanced and targeted manner, you will be contributing to healthy growth and bountiful fruit production. Remember to monitor your tree’s health over time and make adjustments as needed. It’s of no use to fertilize it once and then forget about the plant. Apply good fertilization at least twice a year. With the careful application of this technique, your orange tree will continue to flourish and provide delicious citrus fruits for many years.
Step 3: Aphid and Scale Control
Looking closely, practically every backyard orange tree is infested with aphids or scales. The problem is that we rarely look at them up close.
Controlling scales (mealybugs) and aphids is essential to maintain the health of your orange tree. These pests are tiny but can cause significant damage, affecting growth and fruit production.
Scales and aphids are sap-sucking insects that feed on plant sap. They weaken the orange tree, leading to yellowing leaves, poor growth, and lower-quality fruits. Additionally, these pests excrete a sweet substance that can attract ants and promote the growth of unwanted fungi, such as sooty mold. Fortunately, there is an effective and environmentally friendly solution: mineral oil and soap spray. It will control these pests, even if they are protected by a waxy shell.
Mineral Oil and Soap Spray
Mineral oil and soap spray is an effective solution for controlling scales and aphids, and what makes it even more appealing is that it doesn’t harm other beneficial organisms, such as ladybugs or bees. Here’s how to prepare and apply it:
- 6.7 fluid ounces of mineral oil
- 0.88 ounces of soap (glycerin, coconut, or powdered soap)
- 3.4 fluid ounces of water
- 1.3 gallons of water
Boil the first three ingredients to create a mineral oil emulsion. Add 1.3 gallons of water to the initial emulsion, shake well, and apply immediately with a sprayer before the substances separate again. Apply this spray on a hot day with no rain forecast for the next 24 hours for maximum efficiency. The mineral oil forms a film on the insects and prevents them from breathing.

It is possible that your tree may have other pests, such as leafhoppers, whiteflies, thrips, leaf miner caterpillars, or mites. Take advantage of your decision to revitalize it and inspect closely with a magnifying glass. Here, I have provided tips for controlling scale insects and aphids, which are quite common, but if there are other problems, address them as well.
Step 4: Treating Sooty Mold and Other Fungi with Bordeaux Mixture
Few people know that citrus trees are exotic, domesticated plants and are susceptible to a multitude of pests and diseases. They are usually vigorous in the early years but easily become infested and sick over time. This makes them less long-lived compared to other fruit trees. As you have seen, pests like scale insects and aphids can seriously harm your orange tree. But typically, a fungus accompanies these pests: mealybugs.
This fungus does not directly attack your plant but creates a blackened film on the leaves that hinders photosynthesis. Moreover, other disease-causing fungi can also harm the health of your orange tree.
But be aware: it is of no use to treat sooty mold if you have not previously controlled scale insects and aphids. For this reason, this is a subsequent step.
Fortunately, Bordeaux mixture, a mixture based on copper sulfate and lime, is a powerful ally in the prevention and treatment of these problems. In this topic, we will explore how Bordeaux mixture can be effectively used.
What is Bordeaux Mixture?
Bordeaux mixture is a fungicidal solution that has been widely used in agriculture and gardening for decades. It is a mixture of two main ingredients:
- Copper Sulfate: This component acts as an antifungal agent, inhibiting the growth of fungi and preventing the development of diseases in plants.
- Hydrated Lime or Quicklime: Lime is used to neutralize the acidity of copper sulfate, making the solution less corrosive to plants.
Preventive Application of Bordeaux Mixture
Prevention is often more effective than the treatment of fungal diseases. Bordeaux mixture can be applied preventively at the beginning of the growing season, before problems occur. Here are the steps for preventive application:
- Choose the Right Time: Apply Bordeaux mixture in spring, before new shoots start to grow. This is the ideal time, as it protects the new leaves and fruits from fungal attacks. Never apply natural or synthetic products during flowering. Apart from the risk of harming pollinators, the application can lead to fruit drop.
- Prepare the Solution: Prepare the Bordeaux mixture following the manufacturer’s instructions. Some Bordeaux mixtures are ready to apply, while others come in kits for home preparation. Ensure you use the appropriate protective equipment, such as gloves and safety goggles when handling the components, as they can be hazardous and caustic. Make the recipe correctly and only use a fresh, stable, and neutralized solution. A solution that is still reactive will damage your equipment and may cause skin and tree leaf burns.
- Spray Evenly: Use a sprayer and apply Bordeaux mixture evenly on all parts of the orange tree, including leaves, branches, and trunk. Make sure the solution completely covers the plant’s surface. Apply on cloudy days or in the late afternoon.

Bordeaux mixture is a valuable tool for preventing and treating fungal diseases such as sooty mold in orange trees. It’s a traditional spray approved for organic agriculture. Its annual preventive application at the beginning of the growing season can keep your orange tree healthy and problem-free. If the disease is already present, Bordeaux mixture can be an effective part of the treatment, but remember to identify the disease correctly and follow the instructions carefully. With this care, your orange tree will have a better chance of thriving and producing healthy fruit.
Step 5: Removal of Lichens and Epiphytic Plants
The removal of lichens, parasitic plants, and epiphytic plants is a step often overlooked in the maintenance of fruit trees, including orange trees, but it is of utmost importance for the tree’s health. Let’s explore why this is crucial and how to perform this procedure properly.
Lichens and Their Implications:
Lichens are organisms composed of a symbiosis between a fungus and an alga or cyanobacterium. They typically grow on the bark of trees, including orange trees. Although they are not directly harmful, they can create indirect problems for your tree. Here are some reasons why lichen removal is necessary:
- Blocking Sunlight: Lichens can cover large areas of the tree’s bark, reducing direct exposure to sunlight. This interferes with photosynthesis, a vital process for the growth and fruit production of the orange tree.
- Reduced Air Circulation: When many lichens accumulate, they can also restrict air circulation around the tree’s branches and bark. This creates an environment conducive to the development of opportunistic diseases.
- Bark Decay: Over time, lichens can secrete acids that can corrode the tree’s bark. This makes it more vulnerable to diseases and pests.
Lichen removal should be done carefully to avoid damaging the tree’s bark. A soft brush and water are usually sufficient to remove them.
Parasitic and Epiphytic Plants:
In addition to lichens, it’s important to check for the presence of parasitic plants like mistletoe and epiphytic plants such as small bromeliads and ferns that can establish themselves on the orange tree’s bark. Like lichens, these plants can block sunlight and reduce air circulation. This can weaken the tree and increase the risk of diseases. The accumulation of these plants can add weight to the orange tree’s branches, making them more susceptible to breakage, especially in windy conditions. For obvious reasons, parasitic plants like mistletoe should be removed since they sap the tree’s sap, weakening it directly.
How to Remove Lichens, Parasitic Plants, and Epiphytic Plants:
Start by mechanically scraping off larger plants and lichens. Parasitic plants infiltrate under the tree’s bark like cancer and should be carefully removed. Use a soft brush to gently scrub the affected areas. Be cautious not to damage the tree’s bark. Rinse the bark with water to remove loose debris.

A helpful tip is to use a pressure washer, the same type used to clean sidewalks and cars. The pressure will help remove lichens, but be careful not to harm the bark. Adjust the machine’s pressure to avoid damaging your tree.
Inspect the tree regularly and repeat the process as needed. Remember that the removal of these plants should be done gently, avoiding harm to the orange tree. Keep a watchful eye as the tree recovers and continues to thrive.
Although the removal of lichens, parasitic plants, and epiphytes may seem like an insignificant detail, it is an essential aspect of maintaining your orange tree. Creating a healthy and obstacle-free environment for the tree’s bark is crucial to ensure it receives the light, air, and nutrients it needs to grow and produce high-quality fruits. So, do not underestimate the importance of this step in revitalizing your orange tree. Your tree will repay you with succulent and healthy oranges.
Step 6: Thinning of Fruits
Few people know, but thinning of fruits is a fundamental step in orange tree cultivation. It involves the removal of a portion of the tree’s immature fruits to balance production and ensure that the remaining fruits mature in a healthy and tasty manner.
That’s right! You need to remove the fruits to improve production and keep the tree healthy.
Thinning plays a crucial role in managing the phenomenon known as “alternate bearing.”
Alternate Bearing: Understanding the Phenomenon
Alternate bearing is a natural pattern that many fruit trees, including orange trees, tend to follow. It involves varying the quantity of fruits produced from one year to the next. In years of high production, the tree tends to produce an excessive amount of fruits, while in the following years, production may be much lower.
In other words, there are years when the orange tree produces many fruits, but they end up being small and tasteless or too sour. In contrast, in the following year, it hardly produces any.
Have you ever noticed this?
This cycle of high and low production occurs because the tree directs a significant amount of energy and resources into producing a large crop. This exhausts the tree, leading to reduced production in the following year as it needs to recover. Alternate bearing is a challenge for growers, as an excessive crop can result in smaller and lower-quality fruits.
The Importance of Thinning Fruits
Thinning of fruits is the key to breaking this cycle of alternate bearing. By removing some of the fruits from the tree, you help distribute energy and nutrients more evenly to the remaining fruits. This results in larger, tastier, and higher-quality fruits.
Furthermore, thinning of fruits prevents branch breakage due to excessive weight, which can damage the tree and negatively affect future production. Reducing the number of fruits also improves air circulation and light penetration in the tree, favoring overall health.

How to Thin Fruit
Thinning fruit should be done when the fruits are still small and green, usually when they are about 1 to 2 inches in diameter. Follow these steps to thin fruit properly:
- Choose the Right Time: Perform thinning at the beginning of the growing season, after some fruits have naturally fallen.
- Use Scissors or Sharp Knives: Use scissors or sharp knives to cut the fruits. Make sure to cut the stem of the fruits.
- Select Fruits for Removal: Opt to remove smaller, damaged, deformed, or those fruits that are too close to each other. Leave an appropriate spacing between the fruits you want to keep.
- Maintain Balance: Often, the amount of fruit eliminated during thinning can be substantial. It’s good to know that in some cases, it may be necessary to remove up to 70% or more of the fruits to achieve a good result. However, remember not to overdo it. Leave a sufficient number of fruits to ensure a satisfactory harvest.
- Proper Disposal: Dispose of the removed fruits appropriately, preferably in a compost pile.
Thinning fruit is a practice that requires attention and patience, but the results are rewarding. You will harvest higher-quality fruits and maintain the long-term health of your orange tree. Thinning is a technique that is part of regular fruit tree care and should be performed each season to keep the production balanced and healthy.
Step 7: Ongoing Monitoring and Maintenance

The seventh step, which is perhaps one of the most important and often underestimated, is the ongoing monitoring and maintenance of your orange tree. After pruning, nutrition, pest and disease control, lichen removal, and fruit thinning, the journey to maintain the health and vitality of your orange tree is far from over. In this section, we will discuss the importance of frequently examining your tree, providing supplemental watering when necessary, and consistently performing clean-up pruning.
Periodic Tree Inspection:
The tree is a living organism that is constantly changing. Therefore, it is crucial to regularly inspect your orange tree. Visual inspection allows you to detect problems early, such as pest infestations, disease development, broken branches, or other abnormalities. During the growing season, set aside time every two weeks to take a good look at your orange tree. This simple habit can help identify issues before they become serious.
Supplemental Watering:
Adequate water supply is essential for the healthy growth of the orange tree. Do not assume that nature will provide enough water for it. A fruit tree has a high water requirement for its production, and few people seem to consider this, causing their plant to suffer from thirst. However, the amount of water needed can vary depending on the season, weather, and specific soil conditions. Therefore, it is important to be attentive to the water needs of your orange tree. During periods of drought or intense heat, the tree may require supplemental watering. Check the soil moisture to a depth of about 2 to 4 inches. If the soil is dry at that depth, it’s time to water. Avoid overwatering, as excessive watering can be as harmful as under-watering.
Continuous Pruning:
Continuous pruning is not a one-time process, done once a year, but rather an ongoing task that can be performed at any time. As your orange tree grows and develops, some unwanted branches, diseased, or dead limbs may emerge. Continuous pruning helps maintain the tree’s shape and allows for air and sunlight circulation. Perform minor prunings whenever you notice a branch that needs to be removed.
Revitalizing an orange tree is a rewarding process that requires patience and dedication. Remember that trees are living beings and, as such, respond positively to careful and continuous care. The orange tree in your yard can become a constant source of delicious fruits, and you can enjoy them, knowing that you have contributed to its healthy growth. In summary, by following these seven steps, you can rejuvenate your orange tree and reap the rewards of your hard work. Pruning, nutrition, pest and disease control, lichen removal, fruit thinning, and continuous maintenance are the keys to a healthy and productive orange tree.

Ultimately, it’s important to understand that the longevity of orange trees (and other citrus) is limited. Generally, they are productive for a period of 15 to 25 years, with some exceptions reaching longer. However, even the oldest orange trees may eventually decline in fruit production and health. Therefore, there may come a time when it’s no longer possible to rejuvenate the orange tree, and it becomes necessary to replace your tree.
The choice of a new sapling is an important decision, and considerations include the type of orange you desire, tree size, disease and pest resistance, as well as the specific conditions of your growing location. This is a topic deserving of a dedicated article on its own. So, stay tuned for future information on selecting the perfect orange tree for your garden. Remember, gardening is a continuous journey, and renewal is part of that process. With care and ongoing knowledge, you can enjoy fresh oranges for many years.
Good luck, rejuvenate your orange tree, and enjoy fresh oranges from your yard!