What gongocomposting is and why it’s worth learning
Gongocomposting is an organic waste decomposition technique that uses millipedes (often casually called pill bugs or sow bugs, though they are actually diplopods or millipedes) as the main shredders of dry, fibrous organic matter. Instead of relying only on bacteria and fungi, or on earthworms, this system takes advantage of the powerful jaws of millipedes to break down cardboard, dry leaves, bagasse and other tough materials.
Unlike traditional thermophilic composting, which heats up significantly, and vermicomposting, which prefers moister, softer waste, gongocomposting works extremely well with dry, fibrous materials. It generates little to no leachate, produces a compost that smells like forest soil, and is especially recommended for:
Enjoyed this guide? There's more where it came from.
Understanding why plants behave the way they do is what turns guesswork into a thriving garden. That's exactly what we share in the Shrubz newsletter — free, straight to your inbox:
- Seasonal care reminders timed to your gardening calendar
- Propagation and pruning techniques, explained step by step
- Pest and disease alerts — catch problems before they spread
- making use of raked leaves, light prunings and dried grass clippings;
- recycling shredded cardboard and brown paper;
- producing a loose, granular and stable potting mix, excellent for seedlings and containers.
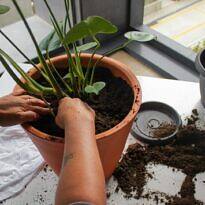
In practice, the result is a kind of “millipede humus” – the gongocompost – which can replace a large portion of commercial potting mixes in seedling production and greatly improve soil structure in beds and pots.

Millipedes are not pill bugs: understanding the creatures involved
Before setting up a gongocomposting system, it is important not to confuse the organisms involved. This helps avoid frustration and prevents mistakes when collecting or managing them.
Millipedes are diplopods, in the group Diplopoda. They have long, cylindrical bodies with many segments, and two pairs of legs per segment. When they feel threatened, they usually curl up into a spiral. A species widely used in gongocomposting systems is Trigoniulus corallinus, the “red millipede,” which is well adapted to urban environments.
The well-known “pill bug” or “roly-poly” that lives in pots and under stones is generally a terrestrial isopod (group Isopoda), a distant relative of crustaceans. They are more flattened, with fewer visible legs, and roll into a rigid ball when disturbed. They also help with decomposition, but they are not the main focus of gongocomposting itself.
In summary:
- Millipede (diplopod): long, cylindrical body with many legs; a specialist in shredding dry, fibrous plant matter.
- Woodlouse (isopod): flattened or oval body, similar to a pill bug; participates in decomposition, but in a different ecological niche.
Both can show up in your bin, and this is completely normal. However, the real driving force of millipede composting is the millipedes.
Where millipede composting fits among other composting methods
In simple terms, you can organize it like this:
- Thermophilic composting: large piles, frequent turning, intense heating, suitable for high volumes and sanitization.
- Vermicomposting: worms, moist and softer waste (kitchen scraps), environment kept consistently damp.
- Millipede composting: millipedes, focused on dry and fibrous waste (leaves, cardboard, bagasse), very little leachate, and a mild, earthy smell.
In urban agriculture and small backyards, this technique has gained attention as a low-cost, community-friendly solution, helping manage pruning and yard waste while also producing potting mix for seedlings. The millipede compost obtained usually has a well-granulated structure, which promotes strong root development and firm root balls in trays or tubes.
What can go into millipede composting (and what should stay out)
Millipedes are excellent at processing materials with a high carbon content (dry waste). The most recommended are:
- Cardboard and brown paper: shredded and lightly moistened; the cellulose is an excellent source of food and shelter, and the starch-based glue also attracts millipedes.
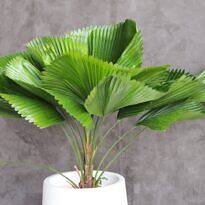
- Dry leaves and leaf litter: leaves from street trees, backyards, gardens, and parks; the more variety, the better the nutrient diversity.
- Grass clippings: preferably dry or pre-dried; in excess and too fresh, they can overheat the system.
- Sugarcane bagasse, corn cobs, and other fibrous materials: residues that worms have difficulty consuming directly, but that millipedes shred efficiently.
- Fruit and vegetable peels (in moderation): best used in smaller amounts and always mixed with plenty of dry material to avoid excess moisture and acidity.
Watermelon, melon, and squash are usually very popular.
For safety and proper operation of the millepede composting system, it is important to avoid certain materials:
- Meats, bones, fats, and dairy products: they tend to smell bad, attract flies and rodents, and throw the system out of balance.
- Excess citrus (orange, lemon, tangerine peels): in small amounts they are fine, but in large volumes they acidify the system too much and can drive centipede-like decomposers away or harm them.
- Excess garlic and onion: they contain strong sulfur compounds; in high concentrations they can be toxic or repellent.
- Very salty or heavily seasoned materials: leftovers of prepared foods, snacks, sauces.
- Plastics, metal, glass, synthetic fabrics: these are not biodegradable.
A useful rule of thumb for millepede composting is to think in terms of balance: plenty of dry, fibrous material along with small portions of moister, more “succulent” kitchen scraps.
Millepede composting in bins: a compact system for small spaces
For balconies, patios, or anyone just starting out, millepede composting in bins is the most practical method. It takes up little space, allows precise moisture control, and makes it easy to manage the animals.
Choosing the bin and basic preparation
You can use plastic storage bins with lids or large buckets with lids. The important points are:
- Ventilation: make rows of holes along the upper sides of the bin to allow air in.
- Drainage: a few holes in the bottom let excess moisture drain; the bin should be raised off the ground on bricks or pallets.
- Protection from direct sun and rain: ideally keep the bin in a covered, shaded, and well-ventilated location.
If you prefer, you can use two stacked bins: the top one with drainage holes in the bottom, and a solid one underneath to collect any liquid that may form. In well-managed millepede composting systems, however, there tends to be very little leachate.
Layer setup and introducing the millepedes
Here is a simple step-by-step process to assemble your first millepede composting bin:
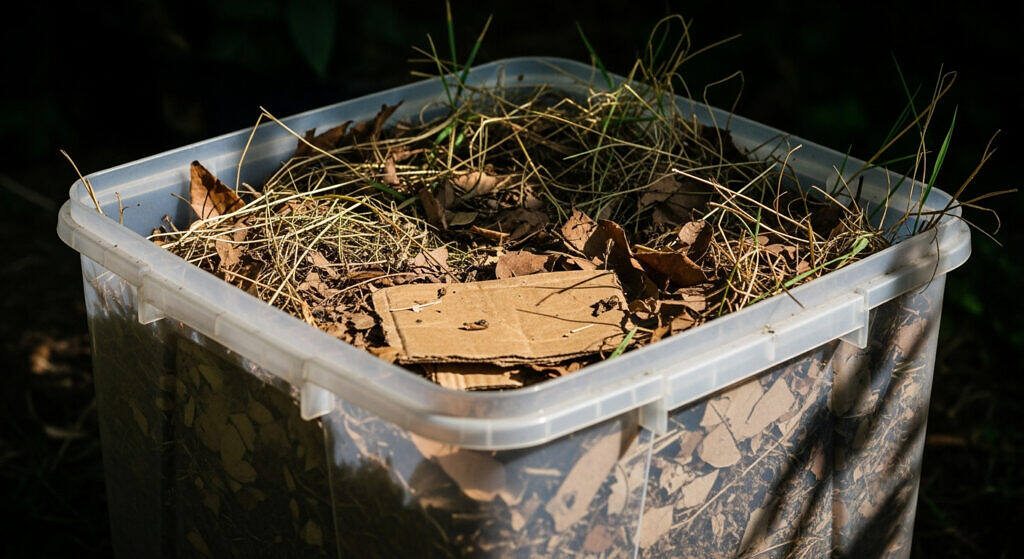
- Base layer: place a 1.2–2 inch (3–5 cm) layer of coarser dry material (thin twigs, whole dry leaves, larger pieces of cardboard) to help with drainage.
- Structural feed layer: add finely shredded cardboard and brown paper, pre-moistened (they should feel like a damp sponge, not dripping). Mix in some dry leaves and, if available, a bit of crushed corn cobs or other fibrous plant residues.
- Initial moisture: mist with water until, when you squeeze a handful of the material, it feels moist but does not release drops.
- Introducing the millipedes: spread the animals over this layer, allowing them to burrow and find their hiding places. They like to squeeze themselves between the ridges of the corrugated cardboard. If you do not have a local producer, you can purchase them from specialized sellers or online marketplaces.
- Dry cover: finish with a generous layer of dry leaves or drier strips of cardboard on top, as a kind of “mulch” cover. This reduces moisture loss and helps prevent small flies.
Millipedes appreciate moist environments, but not waterlogged ones.
After assembling the system, leave the millipede composting setup for a few days without major disturbance, only monitoring moisture. The millipedes will start to move around, break down the cardboard, and feed on the material and the fungi that appear.
Feeding, frequency, and management routine
Millipedes prefer large volumes of fibrous material to consume slowly, rather than small daily portions. In bins, a practical millipede composting routine is:
- open the compost bin about once a week;
- add new waste, always prioritizing dry and fibrous materials;
- include small portions of fruit and vegetable peels if you want to speed up activity;
- cover everything with dry leaves or cardboard after each new addition.
Always monitor moisture: if the material is very dry and powdery, mist it with water. If it is soggy and compacted, add more dry material and gently loosen the top layer to improve aeration. A millipede composting bin is quite different from a worm bin, which is usually more humid. If you are used to worm composting, you will need to account for these differences.
Millipede composting in piles or rings: for those with more waste
In areas with larger volumes of pruning and yard waste, you can create millipede composting systems as piles on the ground or inside rings (for example, a circular arrangement of stacked tires, blocks, or similar structures). The principle is the same: the millipedes shred the dry fraction, while microorganisms complete the decomposition.
The general layout of a pile or ring millipede composting system usually follows these points:
- shaded location, protected from direct waterlogging due to heavy rain;
- a base layer of thin branches to improve drainage;
- alternating layers of dry leaves, dry grass clippings, and moist cardboard;
- introduction of millipedes between the layers richer in cardboard and leaves;
- final cover with dry leaves or coarse mulch, forming a protective cap.
In larger millipede composting systems, you can replenish material monthly or whenever the volume has reduced significantly.
The pile does not need to be turned constantly as in thermophilic composting, because the natural movement of the millipedes helps loosen and break down the material.
Moisture, airflow and temperature: finding the right balance
Although there is no magic number for ideal moisture, you can rely on a few practical signs:
- touch the material: it should feel like moist forest soil, loose and crumbly, without dripping water;
- take a handful and squeeze: if water drips, it is too wet; if it turns to dust, it is too dry;
- watch the millipedes: if they are always clinging to the lid or trying to escape along the sides, something is off (heat, excess moisture, or lack of oxygen).
The bin or pile should be kept in a shaded, well-ventilated area. Millipedes do not tolerate extreme heat or stuffy, closed spaces. Avoid fully sealed lids; always ensure air inlets. On the other hand, keeping rain off the system prevents it from turning into an anaerobic “soup.”
Controlling odors, fungi and small visitors
When millipede composting is in balance, the dominant smell is that of forest soil. If the odor becomes strong, sour, or rotten, it is a sign of problems, usually caused by excess water or too many fresh scraps.
Some common situations and how to respond:
- Bad (rotten) odors: indicate low oxygen or very high moisture. Gently stir the material (without completely destroying the millipede tunnels) and add more dry cardboard or dry leaves. Reduce the amount of fresh kitchen scraps for a while.
- White mold (mycelium): is normal and actually beneficial. These “white rot” fungi help break down lignin and cellulose, and the millipedes feed on both the fungi and the already decomposed material.
- Fruit flies and fungus gnats: usually appear when lots of fruit and wet leftovers are left exposed. The fix is simple: cut back on very fresh fruit waste and always cover new material with a thick layer of dry leaves or cardboard.
Other soil invertebrates—such as springtails, insect larvae, and sow bugs—may also show up. In general, they are part of the decomposition chain and are not a problem, as long as the millipede composting system remains balanced and free of strong odors.
Harvesting millipede compost and millipede frass
Over the course of a few months, the inside of the bin or pile will gradually turn into a darker, loose, granular material, produced by a mix of millipede droppings (frass) and partially decomposed, stabilized organic matter.
A practical step‑by‑step method for harvesting millipost in bin systems is:
- Stop watering for 2 to 3 days so the material firms up and becomes easier to screen.
- Screen the contents using a mesh between 2 mm and 4 mm (about 1/16–3/16 in):
- what passes through the screen is millipost ready to use;
- what remains on the screen (adult millipedes, juveniles, larger pieces of cardboard and intact fibers) should go back into the bin to continue the cycle.
- Separate any juveniles that may have passed through the screen: if there are many, one technique is to spread the screened millipost in a tray and place watermelon or squash rinds on top; after one night, most of the millipedes will gather on these baits, which can then be collected and returned to the composting system.
The material you harvest is a blend of stable organic compounds, with a near‑neutral pH and a low carbon‑to‑nitrogen ratio, which reduces the risk of phytotoxicity. This millipost can be used directly in pots and garden beds or as the base for seed‑starting potting mixes.

How to use millipost in the garden, in containers, and for seedling production
The main advantage of millipost is its physical structure. Because it is well‑granulated, it:
- encourages the development of fine, abundant roots;
- maintains good air porosity, helping to prevent waterlogging;
- forms more stable plugs in seedling trays and cells that do not fall apart easily during transplanting.
Some practical ways to use millipost:
- Seedling production: millipost can be used on its own or mixed with screened garden soil and a bit of coarse sand, depending on the crop. For vegetables with sensitive root systems, such as lettuce and other salad greens, the loose structure of millipost is especially beneficial.
- Pots and window boxes: mix 30–50% millipost with local soil or previously used potting mix to renew both fertility and aeration.
It helps “revive” old, compacted containers.
Because it is relatively stable, millipede compost usually does not “burn” roots. Even so, it is wise to avoid very thick, highly concentrated layers placed directly on the very young roots of sensitive plants—especially in very hot or dry conditions. If you are unsure about potting mixes, you may also want to read more about the ideal potting mix for succulents.
Safe and responsible handling of millipedes
The millipedes used in millipede composting, such as Trigoniulus corallinus, are widely naturalized in urban and suburban areas, but they still deserve responsible management. The issue of non‑native species and their spread is a sensitive topic in ecology (invasive non‑native species), and it is worth following a few simple precautions:
- do not move millipedes in large numbers from one region to another;
- avoid releasing these animals into relatively undisturbed native vegetation;
- keep the millipede composting cycle within your own yard, urban garden, or productive area;
- if you collect native millipedes from your property to start a millipede composting system, keep them within the same general area (do not transport them far away).
In addition, it is important to prevent mass escapes: well‑covered (but well‑ventilated) bins, protected rings, and proper management of moisture and food naturally reduce the tendency of millipedes to wander around the surroundings.
Most common mistakes in millipede composting (and how to fix them)
Beginners in millipede composting tend to stumble over the same issues.
Some common mistakes:
- Adding material that is too wet without balancing it with dry material: Result: bad odors, flies, and millipedes escaping. Fix: cut back on very wet fruit and scraps, add plenty of cardboard and dry leaves, and gently stir the material.
- Lack of dry cover over fresh scraps: Result: fruit flies and an overall dirty appearance. Fix: make it a habit to always cover food scraps with a “blanket” of dry leaves or shredded cardboard after each feeding.
- Compost bin in direct sun or in a very hot area: Result: stressed, dead, or escaping millipedes gathering along the edges. Fix: move the millipede composting bin to a shaded, well-ventilated location, protected from direct sun and radiant heat.
- Too many citrus peels, garlic, and onions: Result: an acidic environment that can become toxic for the organisms in the millipede composting system. Fix: greatly reduce this type of waste; if you want to add some, use only small amounts, well mixed into the total volume.
- Adding meat, dairy, and heavily seasoned food: Result: foul smells, unwanted pests, and microbial imbalance. Fix: send these scraps to other solutions (organic waste collection, dedicated digesters, etc.) and keep millipede composting focused on plant-based leftovers.
See practical tips on how to recycle food scraps to avoid waste.
Practical summary to start your millipede composting today
For those taking their first steps with millipede composting, the process can be organized into a few clear decisions:
- choose the type of system: bin (small spaces) or pile/ring (larger volumes of waste);
- provide a shaded, moist but not waterlogged, and well‑ventilated location for the millipedes;
- prioritize dry, fibrous materials (cardboard, leaves, bagasse, dried grass clippings), using fruit and vegetable scraps only as a supplement;
- avoid meat, dairy, highly seasoned leftovers, and excessive amounts of citrus, garlic, and onion;
- always keep a good dry cover over fresh waste to control moisture and fungus gnats or fruit flies;
- when the material is dark, crumbly, and smells like soil, harvest it with a screen or sieve, returning the millipedes and larger pieces to the composting system.
Over time, you get to understand the “mood” of your millipede composting fauna: when they are most active, where they like to hide, and how much material they can process. It is a quiet but very efficient kind of partnership that transforms what used to be trash—leaves, cardboard, fibrous scraps—into a valuable resource for garden beds, vegetable plots, and containers.
If your goal is to reduce waste and produce high‑quality potting mix at low cost and with very little odor, millipede composting is a robust ally, easy to adapt to everyday life and perfectly feasible even in small urban spaces.